Yearly Archives: 2017

58 posts

What I carry with me for a Marathon

We are just a few days away from the 2018 Walt Disney World Marathon!

I literally am bursting with excitement for the Marathon, I had some struggles with my training but overall I feel confident in my abilities to complete the race! 
So, as I put together my lists of things I’ll be taking with me along the course, I thought I’d share it with you! 
Running Belt
I purchased this running belt prior to the 2015 Goofy Challenge, and have used it for most of my big races ever since. I’ve also purchased a handheld water bottle but found it to be difficult to take pictures while holding the bottle – so, for the 2018 WDW Marathon, I will be pulling out my running belt once again!

It does have some bounce, but I don’t find it to be unbearable. 

If a handheld water bottle is more comfortable for you, check out this one. I used it for the Navy Air-Force half last September and liked it. Like I said, it was hard to take photos while holding this bottle, and since I’m running at Disney, I know I’ll want to take a lot of photos! 
What’s inside my running belt? 
  • Fuel
  • Tums
  • Tissues
  • Vaseline
  • Headphones
  • ID
  • Cash
  • Ipod
  • Phone 
  • 2 Pieces of Chocolate for Mile 20
Fuel
For this training cycle, I’ve found pretzels to be my preferred fuel. I find that the mixture of carbs and salt seem to be just right for my body. 
I’ve also been using some of these Clif Shot Blocks. They aren’t my favorite, as far as taste, but I know my body responds well to these for a boost of sugar during the Marathon. I tested our Skittles but found they gave me heartburn.

Tums
I sometimes get nauseated after my long runs, so I decided to take a few tums with me for right after the race. I considered having my husband keep them with him, but since it takes time to find each other after the race, I want to be sure I have what I need. 
Tissues
In case my nose starts to run, or I find myself in a port-o-potty without any toilet paper, I’ll have what I need. 
Vaseline
In case of chaffing. 
Ipod and Headphones 
I don’t know if I’ll run with them during this marathon, but it helps me stay calm while in the corrals. I can’t stand all the chatter around me, so my headphones help me to get into the zone!
Phone
My phone to contact my hubby, and take way too many photos! 
ID and Cash
For my safety, I always like to have my ID and a little bit of cash on me. 
Chocolate for Mile 20
Because when I make it to mile 20, I want to celebrate with some chocolate! I did this during my first Marathon, and it really did give me quite a boost! 
What’s on your list of MUST have’s for running a Marathon?

Sharing is Caring, Pin for later! 

15 no fuss costumes for RunDisney

The Walt Disney World Marathon weekend is less than a week away! Have you figured out your costumes yet?  Don’t be like me at my first RunDisney race, I had NO idea that we could (and should) dress up for the run!

2012 Everest Challenge 

Some people really go all out and make the most beautiful and elaborate costumes. Check out this Instagram account for inspiration. Personally, I start thinking up grand ideas for costumes, but when it comes time to put them together, I usually end up doing a more simple costume. 

So, to inspire those of us who just aren’t as crafty as others I wanted to share 15 of the costumes I put together with just a few basic articles of clothing. 
I used a skirt from Sparkle Athletic in all of my costumes, you can order them from Amazon.com or the Sparkle Athletic website! Right now if you order one from their website, you can pick it up at the WDW Marathon Expo!

Under my skirt, I wear these Under Armour Shorts, and I LOVE them!

Dressing up for the races is one of the most fun parts of the whole experience, but you don’t have to be elaborate in your costuming, here are 15 of my favorite Disney inspired looks!


1. Orange Bird 

  • Orange Running Shirt
  • Orange Sparkle Skirt
  • Green Visor 
2. Aladdin
  • White Sparkle Skirt
  • Purple Running Tank
3. Princess Aurora 
  • Blue Sparkle Skirt
  • Pink Running Tank 
4. Princess Anna
  • Green Sparkle Skirt
  • Black Tank
  • Hair in Braids
5. Mad Madam Mim
  • Purple Shirt
  • Pink Sparkle Skirt
6. Donald Duck
  • Blue Shirt
  • White Sparkle Skirt
7. Star Wars – Darkside
  • Star Wars Shirt from Rawthreads; or 
  • Star Wars Shirt from Sparkle Athletic
  • Grey Sparkle Skirt
8. Kim Possible
  • Black Tank Top
  • Green Sparkle Skirt
9. Marie 
  • White Tank
  • White Skirt
  • 2 Pink Bows 
10. Candice
  • White Sparkle Skirt 
  • Pink Shirt
11. Gretchen
  • Glasses
  • Blue Shirt
  • White or Blue Sparkle Skirt 
12. Princess Leia 
  1. White Shirt
  2. White Sparkle Skirt
  3. Silver Belt
  4. Hair in Buns 
13. Bellwether
  • White Tank
  • Black Jacket
  • Orange Sparkle Skirt
  • Hair in large poof on top of head
14. Benjamin Clawhauser
  • Cheetah Ears 
  • Blue Shirt
  • Orange Skirt 
15. Ariel
  • Purple Shirt
  • Green Skirt 
  

9 Secrets to a Happy Marriage

Today my husband and I celebrate 9 years of marriage. Nine years of being married to the best friend I’ve ever had, nine years of struggles, triumphs, and lessons learned.

When we said “I Do” on that Warm December afternoon, after being together for 8 or so years, we thought we were pretty ready to face the adventure of Marriage and to be honest, we had some amazing adventures, but we also had some struggles and disappointments. So for my post today, I wanted to share 9 things that have helped our marriage thrive. – These are in no particular order, may they be an encouragement to you.

Laugh Often
There are so many struggles in the beginning of a marriage, for example, I didn’t know until I was married that there was a “correct way” to make a sandwich, and I had been doing is WRONG for my whole life!  In the moment, it was upsetting that this man I married would dare to be unhappy with something so silly as a sandwich, but 9 years later we still giggle about the silly diagram he drew me to help me pack his lunch.

A day without laughter is a day wasted

Charlie Chaplin

Love your Human

I think sometimes it is easy to get wrapped up in the romance of marriage, and being in love. We watch cheesy romantic comedies, that portray perfect love, and grand gestures of love, and begin to picture in our minds how romantic life will be. Truth is, we are human and humans are not perfect. Sometimes your spouse will let you down, sometimes that will sweep you off your feet. Love your spouse during times when you maybe feel disappointed, like when he doesn’t give you a card or any type of acknowledgment on Valentines Day, and when he books a surprise day of pampering at the spa.

Love your spouse and all their imperfections, you yourself aren’t perfect either you know. 😉

*points finger at herself* 


Protect Each other

This one is a big one, it is crucial that you guard one another’s hearts and emotions. My husband is very good at keeping his frustrations with my faults between the two of us, he protects my feelings and encourages me to grow.

Listen

Listen to your spouse as they tell you about their day.
Listen to your spouse tell you about (fill in the blank)

Put down your phone
When we got married, Smart Phones were not in the hands of every middle schooler and above. In fact, I’m pretty sure I had a Sprint Flip phone with no texting.  Now that everyone has instant access to all forms of social media, and our friends it is easy to get distracted and miss out on the NOW. My husband and I recently took a trip to Disney for my birthday and as I went back to my phone to look at the pictures I realized I hardly took any.  Then I thought about all the conversations, and memories we made just connecting with one another, and I felt so content.

Give it a try, disconnect from your phone and just be together once in a while!

Photopass! 
Thanks, Photopass!

Eat together 
No matter what, my husband and I always eat together.  – We find this to be a special time of the day, and one to connect with our children as well. To further the case for eating together, I was just reading a Canadian Study that looks at the long-term effects of families eating together starting in Early Childhood. In our family, we have always put the girls at the table with us when we eat, even before they ate solid food. – Read the study here. 

Travel Together
Have you ever watched couples on the Amazing Race? Isn’t it crazy how much they seem to bicker and argue?  Truth is, you can learn SO much about a person by traveling with them. For example, I am a planner, I LOVE to plan everything out, research menus, check the weather, make an agenda. My husband,… not so much.  Travel together, make memories!

We travel not to escape life, 
but for life not to escape us
anonymous

Cherish your Marriage
Cherish: to care for deeply, to treasure
Let’s be honest, a healthy and thriving marriage is a lot of work. However, if it is something you truly treasure and love it doesn’t feel hard at all. 


Chase the SAME goal
It is so important to be chasing after the same goals and supporting one another. A couple years ago I decided to pursue my Master’s Degree while working full time, figuring out life as a WIFE, and supporting my husband, who was always pursuing his Master’s degree.
It was a mess. – I was doing fine in school, but I was so stressed out.
After many heart-to-heart conversations about our hopes and dreams and goals for the future, I realized that my Master’s in Reading Education would be fun to study, but it wouldn’t get us closer to our dreams.

Here we are, years later living one of the goals we discussed during that time, and it is AWESOME!

So, Happy Anniversary Chris! Here’s to many more memories and lessons learned together!

Sharing is caring, if you found this encouraging would you pass it along? 

Win an Authentic Disney Parks Pin from StorybookErin

Source: GIPHY
I am overwhelmed with gratitude! My little corner of the internet is growing, and I am pleased to announce that I have almost reached my goal on Twitter, in fact, I am so close that I’ve decided to host the giveaway! 
In October of this year, I was feeling so defeated as a blogger. So, I set a goal and if I accomplished it I would redesign my blog, and launch it in 2018. 
So, what was my goal? 

My goal was to increase my Social Media Following by 20%  in two months. 

I reached that goal fairly quickly on all social media platforms, except Twitter. So, I’ve been hanging out on twitter a lot these days and having a blast connecting with people! 
So much fun that I’ve decided that even though I am 44 followers short of my goal, I am going to host the giveaway anyway! 
What will I win?
I have purchased an Authentic Disney Parks Pin, for one LUCKY Follower!! 
How to Enter
  1. Follow @StorybookErin on Twitter 
  2. Tweet to me your Favorite Disney Ride and hashtag, #StorybookErinsmagicalgiveaway
    • Be sure to tag me @StorybookErin so that I can count your entry for the Giveaway! 
** This Giveaway is not sponsored or affiliated with Twitter**

That is it! Good Luck to all who enter!! 


2018 WDW Marathon, Planning, Packing and the Party at the Finish

Source:  GIPHY
Give yourself a HIGH-FIVE! 
Not only have you made the commitment to run a MARATHON, but YOU have made it to the end of your training! If you are anything like me, you’ve probably had some challenges along the way. 
In my opinion, challenges are a part of the Journey to the Marathon, and it is how we respond and how we keep going that will prepare us for the Marathon!  So, here’s to YOU! 
Source: GIPHY
Now that we are less than 20 days away from the Walt Disney World Marathon, I thought I’d share some of the things this Florida native is doing to get myself prepared. 
RunDisney Forms & Information
I am sticking close to the RunDisney website, Facebook, and Twitter for any and all information I can gather. I like to have as much knowledge as possible BEFORE the race weekend, simply because the race is SO huge and SO overwhelming that I don’t want to miss out. 
Here are a few KEY things you will need before you head to the Expo! 
Forgetting to print out your waiver is not  the end of the world, they will have computers and printers available at the Expo for you to print out, but you might want to go ahead and take a look at the waiver because printed on the bottom you will find your much-anticipated BIB NUMBER

2. Bib Number 
Your Bib Number helps you understand where you will line up and begin on race day. You as a runner, want to be as close to the start line as possible, this gives you an advantage because there are fewer people on the course. So, once you’ve gotten your bib number head on over and check out your CORRAL PLACEMENT

3. Corral Placement
In order to keep some kind of order on the course, RunDisney separates all the runners into Corrals. Each Corral represents a predicted pace. This is why it is crucial to submit a proof of time by the deadline, you might remember my fail of an attempt for a proof of time from earlier this fall (Refresh your memory
For the 2018 WDW Marathon, my POT landed me a spot in the G corral, so if you are in my corral – say Hi! 
Find out your Corral Here. 
You might always want to check out the Event Guide to see where your favorite vendors will be and start following them on Social Media. The girls over at Sparkle Athletic are amazing on Social Media and are always giving away prizes, so make sure you follow along! 
Sparkly Soul has also been known to host a giveaway or surprise sale to their social media followers! 
Now that you are RIDICULOUSLY excited for the weekend, let’s talk PACKING! 

The weather in Orlando during the months of December and January are awful to predict, but here is what I can tell you based on the last couple of years of following along with this race.
In 2015, when I ran the Goofy Challenge with my husband Orlando was hit with a crazy cool front, that put the runners of the 5k, 10k and Half Marathon under FREEZING conditions at the start. I’m not talking, “freezing” for a Floridian, I’m talking actual freezing, in the 20’s weather! 
The Half Marathon was so cold for this Miami girl, that I actually ran the entire race in Sweat Pants!

2015, 5 months pregnant with Baby # 2 
In 2017 my sisters were scheduled to run the Goofy Challenge, but when torrential downpours happened on Friday night and into Saturday the race was actually CANCELLED and on Sunday it was absolutely freezing for the Marathon. 

It is still too early to do a weather watch for the 2018 Marathon weekend, but typically about 10 days prior you can start to see what you might expect for RACE DAY!

So, how should you pack for the WDW Marathon Weekend?

Pack in layers for all types of weather.

Here are some of my favorite race day options to stay warm before the race!*

You’ve done the training, you’ve prepared yourself as much as possible for the festivities of the weekend, now it’s time to Party!

Source: GIPHY
Now is not the time to be stressing over anything, except how much fun you will have! If you’ve been training and putting in the work to the best of your abilities than now is the time to sit back and enjoy the experience. There is truly nothing like running a Walt Disney World Marathon! 
Read all about my first WDW Marathon here.

Sharing is caring… 


Christmas with Toddlers, How we are doing things a little differently this year.

Christmas is such a loved season, by so many people – myself included. I love it so much, I had a Christmas themed wedding and got married on the Saturday before Christmas 9 years ago.

Now that we have children, it’s a whole new level of excitement.  Everything from the candy canes, Christmas Stories, Meeting Santa, and Decorating Gingerbread houses is exciting for them, and because of their excitement, I am also more excited for Christmas this year!

But even more than the fun of the season, I wanted my girls to see Jesus in the season. I wanted them to know the reason why we celebrate Christmas, and I wanted them to love Jesus. 

So, how do I foster of love for Jesus in an over-commercialized holiday? We talk about him, and the reason every, single, day. We read about the nativity story, act out the Christmas Story, and play with the nativity scene.  We also decided that this year, my husband and I would not purchase gifts for our two older girls (3 and 2). Instead, we have decided to let the girls pick our gifts for each other. 
It’s been such a treat to listen to them talk about it, and honestly, there is nothing I could buy that would excite these sweet girls as much as the much-anticipated trip to Target.  
Additionally, we have been counting down to Christmas using an approach inspired by Esther over at Story of this Life, She wraps a gift for her girls each day in December and has them open it and they read the scripture verse together. Our family started on Tuesday, December 12th, by reading the passage and playing with the piece of the nativity scene. So far the girls are really into it, and I am so thankful that Story of This Life made a printable so I could easily do this with my family and so can you! – Get yours on their Blog! 

SOURCE: STORY OF THIS LIFE
  

Raising Kind Girls in a “Mean Girls” World

When I was pregnant with my second daughter, and quickly approaching the season of life known as “2 under 2” I was given plenty of “advice”. I was told things like…

“all they will do is fight, from birth to adulthood”
and 

“it’s really too bad you aren’t having a boy, 

girls are too competitive with each other” 

Um… Thank you?? 
I’d often be in tears while talking with my husband about the things people would say to me and then, I gave up listening to the “advice” of the people who seemed feel as though the relationship of my two children would be strained from birth.  
Why am I going to let other people’s opinions shape my expectations of how my two children would treat each other?

Didn’t God give these girls to MY husband and I to raise? 
So, when our Zuzu-bug was born I made a conscious effort to guide their friendship, and help them to learn from a young age to work things out together and no matter what, to always love and support one another!

Do I have two perfect daughters who never fight or disagree? 
No, I don’t. 
Do I have two girls who love each other fiercely? 
Yes. 

So how did I encourage kindness with my girls? 
1. Model.

Our children are like sponges. Literally, EVERYthing we do, they see. For example, my husband has a cough and is in the practice of coughing into his elbow. What did our 1-year-old start doing when she developed a cough?
Yep. She’s coughing into her elbow like a little grown up. 
If we want our children to be kind and respectful, we need to check ourselves and be sure WE are being kind and respectful to our spouse, our children, and those we come into contact with. 
2. Define it. 
Children look to adults to learn the meaning of words, it’s so important that we help them understand the meaning. If I want my children to “show kindness” I better be willing to give them concrete examples in their daily life. 
For instance, we can say things like thank you for helping your sister clean up the toys, that was very kind of you. 
Any time you catch your child doing something nice or kind for someone else, TELL them!  

Let praise and compliments fall off your tongue and

 watch their confidence grow! 

There is always a Reason to BE KIND. 


Let’s get real for a moment, shall we? 
Do my children constantly show kindness? No, again. They are young toddlers. However, there are moments when they surprise you. Like the time at Disney when my oldest who was two at the time ran ahead as she saw two employees emptying a garbage can. She stopped, sang the cleanup song (from Barney) and said “thank you for cleaning” The smile on the cast-members face melted my heart and in that moment I knew we were on the right track! 


How can you show kindness to someone today? 


Gift Ideas for the BIG SISTER or BIG BROTHER to be!

Being a Big Sister (or Brother) is a pretty exciting new chapter in a person’s life. I remember when we welcomed my little sister into the world, it was a big deal. Of course, I was 5 years old so I have more memories of the time than I think my 2 and 1 year old will have, but nevertheless, I think it’s important to honor them as their place in the family shifts.

Since I was induced for all of my pregnancies, I made sure to pack lots of items to keep the big sisters occupied while they waited for their baby sister to arrive!

Coloring Books! 

I packed the girls gifts in a small backpack, I used one found at the Target Dollar Spot, but something like this would probably be better quality. 
Inside the backpack we had the following:
  • New Pajama’s 
  • Books
  • A new outfit
  • Bubbles
  • Coloring Books and Crayons!
  • Big Sister Button 

My girls were so excited to receive their gifts and absolutely adore their baby sister!

Question of the day: What would you include in a gift bag for a big sister or brother?

Quick, Easy, Frugal Friendly Sugar Scrub Recipe

Frugal Friendly Sugar Scrub

Disney Springs: Must Do

One of my favorite places to go to in Disney Springs is Basin.  Today I am going to share with you how I make my DIY scrub with just a few ingredients.  Visiting Basin is such a fun experience. I just love all the unique fragrances, hydrating scrubs, and Magical soaps!  One of my favorite products is the body scrub. I love the way it makes my skin feel. Since adding a couple of princesses to our family, we don’t get to shop in Disney Springs or visit Basin very often anymore. When I realized that I could make my own at home with only a few ingredients, I was thrilled.

Basin sells a jar of their body scrub for around $35.00, but you can make your own with just three ingredients that you might already have in your home!

Uses for the Sugar Scrub

I recently used to create party favors for my sister in law’s baby shower. This recipe was so easy that my three-year-old was able to mix the scrub and help assemble the jars for gifting. This scrub is great for gifts, or to use personally in your home.

DIY Body Scrub

Some of my favorite essential oil scents to try. 

  • Lavender
  • Lavender and Lemon
  • Peppermint
  • Peppermint and Lavender
  • DoTerra Serenity

Why Fractionated Coconut Oil?

Fractionated coconut oil has been processed to remove the coconut scent, and also will not harden in cooler temperatures.


Can I use regular olive oil or coconut oil for the scrub? 

Yes. You can certainly use olive oil or the coconut oil for the scrub, I have. However, please be aware that the scent of the oil can be overpowering.

Where I buy DoTerra Essential Oils

I purchase my DoTerra essential oils directly from my mom who is a DoTerra Wellness Advocate. She has used EO’s for many years and has a lot of information on improving health and well-being through the use of EO’s. I’d encourage you to connect with her to purchase some oils of your own.


Purchase Oils Here! 

Instructions

  1. In a mixing bowl add a 50/50 mix of sugar and coconut oil.
  2. Add 10-15 drops of essential oils
  3. Stir until you have created the consistency you prefer
    1. If the mix is too wet, add Sugar
    2. In the mix is too dry, add oil
  4. Store in a glass container and enjoy!

SHARE ON PINTEREST


Disney Tip: 

Basin can be found in two places on the Disney World Property.
1. In Disney Springs
2. The Grand Floridian Resort
I love to go to the one inside the Grand Floridian as it is a much smaller store, and never as crowded as the one in Disney Springs. You’ll also get a chance to check out the beautiful Disney resort! *Pay attention to the floor in the Grand Floridian Lobby, you might spot some Disney Pals in the tile designs.

Get into the Holiday Spirit with this FREE Disney Experience

Want to Experience some Disney Magic this Holiday Season, but would prefer not to pay the hefty price tag for a park ticket? Check out the Christmas Tree Trail in Disney Springs!

November 10, 2017, through January 7, 2018, experience 
this festive holiday experience 
FOR FREE!


Where to park
The Christmas Tree Trail is located in the Market Place, very near to the Days of Christmas shop. However, there parking on that side of Disney Springs can be quite hectic and often full. Instead of parking on the Marketplace side, park in the Orange Garage and either walk or take the short boat ride to the other side of Disney Springs. The boat ride drops you off just outside the exit to the trail, so this option is especially great if you are traveling with any young children. 
The Christmas Tree trail features 25 trees beautifully themed after a Disney Character or one of your favorite movies.  You will also experience festive holiday music, snow and can even make reservations to see Santa Clause himself.  More details here
Each tree was beautifully themed, with intricate details about either the movie or character so you can either take a long leisurely stroll through the trail exploring each detail or just walk through enjoying the ambiance.  (Full Walking Tour on our Youtube Channel)

Whether you are leisurely walking through searching for Hidden Mickey’s and Secret details or chasing your toddlers through the trail, take a look at the tree toppers, each one was so unique and so beautiful. My favorite was Miss Piggy on the Muppet Tree! 
For an added treat to the Disney fan, pay attention to the signage around each tree. 
This Disney Magic experience is sure to get you into the Holiday Spirit! 
If you are traveling with older Children, or adults only check out Stitch’s Holiday Gift Hunt. This FREE Scavenger hunt through Disney Springs. Ask a cast member for your guide, and head on a tour through Disney Springs. If you complete the hunt, you will be eligible for a surprise! This activity could absolutely be completed with babies and toddlers but might be a little more challenging. 
If you are looking to add some FREE Disney Magic to your holidays, check out these two great Family Friendly Experiences in Disney Springs! 
From our family to yours, Merry Christmas! 
PIN FOR LATER!
Add to the Magic with these Fun and Festive Products!*


*Amazon Affiliate Link. 

What’s in my Lunchbox? Family of 5

Need some lunchbox inspiration? Look no further! Here are the items that I pack for an afternoon at the Zoo, Park or Theme Park with my family!

  • Sandwiches 
    • Peanut Butter only for the girls, cut into fun shapes!
    • Peanut Butter and Jelly for my husband and I
  • Nuts (for mom and Dad)
    • Almonds have been my favorite right now 
  • Fruit (pick 2)
    • Apples
    • Grapes
    • Clementines
    • Strawberries
    • Blueberries
  • Veggies (1 or 2)
    • Grape Tomatoes
    • Carrots
    • Cucumbers
    • Peppers
  • Cheese
    • Cubed
    • Cheese Stick
  • Yogurt
    • I like to freeze them, they are the perfect temperature by the time we eat lunch 
  • Something Crunchy (1 or 2)
    • Granola Bars
    • Puffs
    • Cereal
    • Pretzels
My current favorite lunch box is one that I purchased from my friend Deanna who is a Thirty-One consultant. 
The Around the Clock Thermal is perfect for packing lots of snacks for your day at a theme park, the local park or zoo. Some of my favorite features include a long strap for cross body carrying, front zipper to carry hand sanitizer and a small trash bag. 
Current Price: $30.00
Get yours from your local thirty-one representative or from my friend Deanna
Let’s support as many small shops and small businesses as we can this Holiday Season. Let me know in the comments below, what are some of your favorite small businesses? 

SHARE ME ON PINTEREST! 

    5 Reasons to be a member of the Zoo!

    When is the last time you went to the Zoo?

    As a mom young children, I am always looking for educational and fun experiences for my family. While I was studying for my bachelors in Early Childhood Education, I specifically remember the remarkable rate in which the brain develops in the first three years of life.

    85% of the brain development 

    happens in the first 3 years! 

    5 Reasons to purchase a pass to the zoo
     
    As a mom of three children ages three and under, I feel it is crucial to their academic success to fill their days with meaningful experiences. Which is why I asked for an annual pass to the Zoo last Christmas, and it has been the most fun year with the girls yet!
    Here are my five Reasons why I think you should consider an annual pass to the local zoo! 

    1.  Meaningful Experiences

    There are so many opportunities to learn at the zoo. Some of our favorites include; animal shows, talking with a zoo-keeper and feeding the animals. 
    StorybookErin - 5 reasons to buy a Zoo Pass
    StorybookErin - 5 reasons to buy a Zoo pass

    2. Encourage Physical Activity

    The Zoo is often quite large and filled with playgrounds and splash pads. These are great places to let your kid out of the stroller and burn some energy.   The Center for Disease Control (CDC) recommends a minimum of 60 minutes of physical activity a day for children. It’s easy to encourage an extended time of play at the zoo, and as an added bonus your kids will sleep better at night.
    Storybookerin - 5 reasons to buy a zoo pass

    3. Splash Pads!

    Our local Zoo has five splash pad’s throughout the zoo and they are all free for visitors to the zoo! This is especially great during the summer months! Not all zoo’s offer free splash pads, for example, when we visited the Audubon Zoo in New Orleans there was an extra charge for the water area.  My experience in Florida is that there will be a free water area for kids!

    4. Special Events! 

    Are you are looking for an Easter Egg hunt or a place to take your family trick-or-treating? Check out your local Zoo! Each year we have taken our girls to these special events for FREE. Thanks to our membership!
    StorybookErin - 5 reasons to purchase an annual pass to the zoo
    StorybookErin - 5 reasons to purchase an annual pass to the zoo

    5.  Increase Conversation and Communication 

    When we go to the zoo just as a family, we will often pick a nice shady park bench and have a snack. We like to sit near a large animal such as an Elephant or Giraffe this. During snack time, our girls seem to really open up and ask questions about the animals. Our most recent trip resulted in a 20-minute conversation about Elephants, and how they use their trunks to eat.  Toddlers have growing minds and lots of questions, let’s give them opportunities to ask questions and explore their world!
    StorybookErin - 5 reasons to purchase an annual pass to the zoo
     

    See you at the Zoo! 

    Here are a few other zoo’s our family has explored!

    Santa Fe Teaching Zoo, Gainesville FL

    Jacksonville, Florida

    StorybookErin - 5 reasons to purchase an annual pass to the zoo
    Share me on Pinterest. 


    Harmony Barbershop, Walt Disney World

    Ladies and Gentlemen, boys and girls,

    Welcome to the Magic Kingdom –

    Where Dreams Come True!

    If you dream of creating a magical experience for your child’s first haircut, I urge you to consider Harmony Barbershop on Main Street, in Walt Disney World.   Each stylist at Harmony Barbershop is a state-licensed cosmetologist, armed with stickers and pixie dust to ensure a magical experience.

    The “My First Haircut Package” is only $25.00, and includes a personalized certificate, a small piece amount of hair from the first cut, and commemorative Mickey Ears!  Harmony Barbershop also offers haircuts for children (9 and under) for $18.00 and an adult haircut is $19.00.

    Although there are a few walk-in appointments available, you might consider calling ahead to make a reservation. Especially since you will be using some of your time inside the Magic Kingdom to get your haircut.

    Reservations can be made by calling (407) 939-7529
    Prior to arriving make sure your child’s hair is clean and dry and detangled. The stylists do not wash your child’s hair, but will potentially spray some water on their hair.  You have to arrive and check in about 20-30 minutes prior to your appointment, this is to ensure efficiency with appointments. After checking in for our appointment, we sat outside on Main Street and enjoyed the ambiance, took some “before” photos and listened to the Barbershop Quartet singing nearby. 

    Once it was our turn, the whole family (and I mean, the whole family) piled into the window seat of the barbershop and watched our two oldest daughter’s first haircuts. 

    The stylist first introduced herself to our daughters and gave them as many Mickey stickers as they desired, and toys to play with during the haircut.  The entire haircut lasted about 30 minutes per child and included a sprinkle of pixie dust at the end. 

    I was a little concerned that our girls would get a little anxious to get down during the middle of the haircut, so I purchased a Mickey Lollipop at the gift shop next door for them to enjoy during the haircut. 
    We had such an amazing experience at the Harmony Barbershop, and even with our large family group piled into the room we were not once treated disrespectfully or asked to rotate guests in and out of the barbershop,  it was truly a magical memory, one I will cherish for the rest of my life.

    So, if you’ve got a trip to Disney coming up and you want to add a little extra magic in your day, consider stopping by the Harmony Barbershop. Even if you aren’t getting a haircut, ask for a sprinkle of pixie dust to add a little extra sparkle to your day. 
    SHARE ME ON PINTEREST. 

    Feed FIVE people a Thanksgiving Inspired Meal for 15 Bucks!

    Happy Thanksgiving!

    Here in the Jimenez Family, we believe that Thanksgiving deserves plenty of attention and recognition. We do not feel it appropriate to put our Christmas tree or decorations out until after Thanksgiving!

    Does anyone else feel this way? – Just us? 


    This year is a magical season of life for us. Our girls, ages 3,2 and 1, have simply fallen in love with holidays and love to celebrate them. I mean, it took at least a week for our three-year-old to understand that we couldn’t just go trick-or-treating every day.  Since our girls are really into the holidays, we wanted to make them last and create many positive experiences for them. So I got the idea of hosting a Thanksgiving meal, just our family!

    Traditionally we spend Thanksgiving Day in Miami with my husbands family, and then Friday – Sunday in Orlando with my family (2015 Thanksgiving Vlog). We have a wonderful time, but this year, as I said, I wanted to extend the Thanksgiving Celebration and being a family of five on a single income, I knew I had to do it for as inexpensively as possible!

    So, when I found a great deal on Chicken at the grocery store, I knew it could be a reality! Here is how I put together a beautiful Thanksgiving inspired meal for my family for under 15.00!

    I purchased the chicken at my local *Winn-Dixie, but all other supplies were purchased at Aldi. I’m a new convert to the Aldi obsession and plan to do a full blog post about shopping at Aldi and what I love to buy, so stay tuned!

    Menu (with Aldi Pricing)

    • Sweet Potatoes (.89 3lb bag)
    • Marshmallows (.89 1lb bag)
    • Frozen Corn (.99)
    • Frozen Green Beans (.99)
    • Carrots (.69)
    • Stuffing (.89 a box)
    • Apples (3.99)
    • *Boneless Chicken (4.71 4lbs)
    TOTAL: 13.15

    Putting it all together! 
    In general, we keep our meals pretty simple, so adding a few extra side dishes to our dinner was no problem. 
    Vegetables
    • Steamed with a little salt, pepper, and butter
    Sweet Potatoes
    • I used my slow-cooker technique to make the sweetest, sweet potatoes ever
    • Topped with Marshmallows and melted for a bit in the oven after the chicken was resting. 
    Chicken
    • Baked until done with seasonings I had on hand (salt, pepper, onion powder, garlic) 
    Stuffing
    • I purchased it but didn’t make it. When I do make it, I like to add apples, onions, and some celery for flavor and crunch. 
    Dessert
    • Apple Crisp! 
    My husband looked up a recipe, I halfway listened, and improvised on the recipe to create something new, the end result was delicious so I thought I’d share! 
    Instructions:
    In a bowl mix:
    • 5 Peeled Apples (3 granny smith, 2 Fugi)
    • Juice of 2 limes
    • Cinnamon
    • 1 tbs sugar 
    Once combined, add to a square baking dish
    In a separate bowl, mix:
    • 1 stick of butter 
    • 3/4 cup flour
    • 3/4 cup sugar
    • 3/4 cup oats 
    • a splash of vanilla
    • cinnamon 
    Once it has reached a chunky consistency, add it to the top of the apples and bake at 350 degrees for 40 minutes. 
    Serve with Coffee and enjoy!

    Over dinner, we read some books from the local library and spoke about gratitude. It was a fun little evening for our family, and I think one we will add to our family traditions! 
    I hope this post inspired you to create beautiful memories with your family!  If you decide to take on the challenge of serving a Thanksgiving-inspired meal for under 15.00  I’d love to see photos and hear stories so be sure to reach out on Instagram or leave some comments below! 
    Happy Thanksgiving!

    PIN ME!
    _ _ _

    *This post contains affiliate links.

    Evelyn Greer Park, Pinecrest FL

    Did you know that according to the Centers for Disease Control and Prevention, the childhood obesity rate as more than doubled since the 1970’s and that 1 in 6 children from the ages of 6-19 is considered to be obese?

    The CDC recommends at least 60 minutes of daily physical activity for school-aged children, living in a small condo this isn’t always the easiest for us to accomplish that at home, so we love to explore all the beautiful parks in our area. We typically spend about 45 minutes to an hour at the park, and that includes our picnic time.

    One of the parks we recently visited a park located in Pinecrest, Florida and fell in love with all that it had to offer.

    Evelyn Greer Park is absolutely BEAUTIFUL! As we approached the park, I couldn’t help but notice the beautifully manicured park, and the fence around the playground. As a mom with multiple children, the fence is a huge perk!

    This park has several soccer fields, a batting cage as well as a fitness and walking trail that is a little longer than a quarter mile – great for the mom or dad who wants to get a little walk in before playing on the playgrounds with your family.

    Prior to Hurricane Irma this park had a large canopy over the playground, hopefully, this will be back up soon because there wasn’t much shade on the playground itself – but the walking trail was quite shady.

    Another thing I loved about this park was the large clean restrooms. When you have a potty trained and potty training toddler, clean restrooms are a must and this park provided!

    I can’t say enough positive things about this park, we had such a lovely time. If you’d like to see more of what this park has to offer, please take a moment to watch our Youtube Video and give us a subscribe. 😉

    DIY Turkey Shirts

    Thanksgiving is just around the corner, and we have been having a BLAST getting ready! My girls and I are memorizing a bible verse together and talking about the things we are grateful for each day.  I even have an entire Pinterest Board dedicated to creating a memorable and magical Thanksgiving with my girls! You can read all about the activities we are doing, in this post.

    In 2012 my husband and I decided to make the commitment to complete our local Turkey Trot every year, no matter what. At the time, we didn’t have any children and were very new to running and our weight loss journey’s so the commitment was made.

    By 2013 I was expecting our first daughter (in January), but I held my commitment and completed the Turkey trot

    In 2015 my husband and I woke up to POURING rain, so we left the girls with their grandparents and ran the Turkey Trot, just the two of us. 
    2016 I started the tradition of dressing up in festive Turkey Apparel, and since it was really last minute I opted to dress as a “burnt turkey” – Let’s be real if I attempted to cook a turkey, it’d either be raw or burnt.  
    This year I decided I wanted to dress the whole family up like a flock of turkeys for the event, so off to the internet, I went. While scrolling through Amazon, I found an adorable shirt that would be SO easy to make. So, I did and the whole project cost less than 10.00! 
    Here is the breakdown of cost from Walmart
    Shirts: FREE* I recycled shirts from other projects
    Rit Dye: 2.97
    Googley Eyes: 4.97
    Felt: Free* I already had these items on hand in my crafting supplies
    Felt at Walmart is about .97 a square 
    Hot Glue Gun / Glue: Free* this is another item I had in my crafting supplies 

    Total Spent: 7.94 + tax
    My Inspiration
    As you will see in the video, this project was as simple as cutting and gluing the shapes onto my shirts. This craft can easily be done as a family project too! I opted to complete it when my older two children were asleep, but I know they would have been able to handle this with no problem. Just be sure to be mindful of the hot glue. 
    If you liked this video, and want to see more quick and easy budget-friendly DIY’s be sure to subscribe to my channel and leave a comment. Your support of StorybookErin is greatly appreciated. 
    PIN FOR LATER.
    This post contains affiliate links

    My Breastfeeding Story + Tips for meeting your Breastfeeding Goal

    This post has been whirling around in my mind for quite a while, in fact, I wanted to write this post about two years ago when I weaned my first daughter. However, after a complete FAIL at breastfeeding my second daughter, I just felt inadequate.

    So, before I get to my tips I thought I’d briefly share my journey with you. When I was pregnant with my firstborn, I was determined to breastfeed for a year. It was going to be so easy – I mean, everyone I knew that breastfed their children made it look so easy, and I took a class so obviously, I’d be a professional right after delivery… right?

    I wish I could tell you that it was easy, I really do but the reality is, that it isn’t. My firstborn had severe reflux, and so most of what she ate was projectile vomited back up (super gross, I know!).  As a result, my daughter was breastfed about 50 percent of the time and then 50 percent bottle fed.

    She was fulled weaned by 10 months.

    My breastfeeding journey with baby number 2 was very brief. We were in the middle of a major life change, and as hard as I tried to breastfeed, I just couldn’t. My milk never came in, and I was so stressed out with our recent move across the state, that I made the decision to bottle feed and it was literally the best decision ever! 
    Yes, I said it. The BEST decision ever, one I do not regret for a moment. 
    Bottle feeding gave me such a sense of freedom, I was able to allow my husband to help out with the feedings, and get some sleep or go for a run a few times a week.  
    In August of 2016, I was fully intending to bottle feed baby number 3. When my second born weaned at 6 weeks old, I was devastated – I spent months feeling like a complete failure. So, as we were approaching the arrival of our third baby I knew I didn’t want to go through that emotional rollercoaster ever again – so I was going to bottle-feed. 
    Funny thing about my plans, they almost NEVER work out. So, when we arrived home from the hospital with our darling little girl in September of 2016, I also arrived home with a clogged-duct. Knowing that I could get develop mastitis, I got to work pumping, and feeding. It took about a week, but everything cleared up and as a result, I had established a pretty solid milk supply and my little one had figured out how to latch! 
    After 13 months of mostly exclusively breastfeeding, my girl has weaned me and I can honestly say, I am so thankful for the experience. Breastfeeding wasn’t easy, but we made it 13 months, a full 13 months longer than I thought and as she becomes more and more independent I can’t help but reflect on the times I got to hold her close and provide everything she needed. 
     Now that I’ve shared my story from feeling like a failure to breastfeeding a toddler I thought id share a few things that helped me overcome my breastfeeding anxiety and grow to love the experience. 
    1. Find a Tribe
      • Supportive Family Members 
      • Supportive Friends
      • Online Groups
    2. Be Confident in Public
      • Have a good cover, and know how to use it
      • Learn to feed and walk
        • I mastered feeding and walking in two different baby carriers – LIFE CHANGING!
      • Know the law for your state, here in Florida a woman has the right to breastfeed her baby anywhere she is allowed to be (More information here).
    3. Stay Hydrated 
      • Keep a bottle of water near you at all times
        • I prefer one with a straw, it’s much easier to drink out of when your hands are full. 
    4. Eat a Well-Balanced Diet
      • When you are establishing your milk supply, you don’t want to be cutting calories. In my experience, if I didn’t eat plenty of nourishing fruits and vegetables my supply would start to go away. 
    5. Master the Latch and Positions
      • A bad latch can cause serious pain, make sure the latch is deep and comfortable. 
      • I watched several youtube videos from La Leche League to help me understand how to find a comfortable latch 
      • I also spent some time mastering different feeding positions until I found ones that worked for both of us
        • In the evening I would do side-laying position because it was the easiest to get my daughter back to sleep and transferred into her crib. 
    What is your breastfeeding goal, how can I help support you in your journey – Let’s connect! 
    Pin for later


    Animal Kingdom: Fun Facts and Things to Do

    Jambo Friends!

    Today I’m going to share a little about Disney’s Animal Kingdom. When Animal Kingdom opened in 1998 I was approaching high school and our Disney Trips were mostly reserved for Night of Joy.

    As a result, my first visit to Animal Kingdom was a few months before my husband and I got married in 2008, and I don’t have childhood memories of this park and it just isn’t my favorite. However, once we purchased an Annual Pass to Walt Disney World, we’ve been exploring the park and I’m finding a better appreciation for this theme park – especially because of the Dumbo Style ride in Dinoland USA.

    Make sure you take some time to explore The Tree of Life as you enter Discovery Island. Standing at 145 feet tall and 50 feet wide, there are over 300 animals carved throughout, you might find your favorite mouse hidden among the branches.

    Speaking of your favorite mouse couple, take some time to go visit the Mickey and Minnie meet and greet as AK is currently the only theme park that provides an opportunity for you to meet them together. During the Holiday Season, you will even have an opportunity to see them in their festive sweaters.

    My favorite ride in Animal Kingdom is Expedition Everest! Unfortunately, our children aren’t quite tall enough for the attraction. That’s why I love to take advantage of the Rider Swap that Disney offers. Before entering a ride, make sure you ask the cast member for a Rider Swap ticket so that you can switch places with whoever is watching your little ones – it’s a great perk for everyone in your party to ride the coaster without spending most of your day in line.

    While the big kids are riding Expedition Everest is the perfect time to try a Mickey’s Premium ice cream bar! There’s a quick service location just to the left of the entrance for the ride.

    Animal Kingdom is unique in that this theme park is considered more edu-tainment than entertainment. Meaning, there are lots of opportunities to create learning experiences with your family. My girls enjoy walking the nature trails, visiting the tigers and visiting the aviary, make sure you pick up an animal guide at the front of the trails this creates a fun game while searching for the animals.

    There is so much more to do at Disney’s Animal Kingdom, you’ll see why it’s quickly becoming one of my more preferred parks to visit, especially with my young family.

    So what do you think, is Animal Kingdom a MUST SEE or MUST SKIP?

    Want more Disney? Check out our Animal Kingdom Vlog on Youtube! 

    PIN FOR LATER 

    Creating Positive Thanksgiving Memories with your Family!

    Thanksgiving is just a few weeks away, and here in our home, we have a whole month of fun activities planned! My goal during the baby and toddler years is to create magical memories and build an atmosphere of love and support. I believe it is my responsibility to create real tangible experiences that help my children develop a love of learning and help keep their imagination and their dreams growing.

    During the month of November, our family will be memorizing Psalm 107:1. Each morning in November I will practice this portion of scripture with the girls, and then in the evening around the dinner table, we will be discussing and documenting the things we are thankful for. Even though my girls are only 3, 2 and 1, I feel it’s important to encourage an attitude of gratitude. I’d like to make this a family tradition where we can pull the journal out each November and see how things change, or maybe some things stay the same?

    Want to join us? Get the conversation going during your next family gathering. 


    I’ve also created a Thanksgiving Pinterest board where I’ve been collecting lots of age-appropriate activities to do with the girls!

    I’d love to have you be part of my little community on Pinterest, so be sure to give me a follow!

    From the Archives: My Experience at the 2015 Marathon

    Hiya Pals!

    Happy Throwback Thursday, as I prepare for the 2018 Walt Disney World Marathon I can’t help but reminsce about the first time I ran a Marathon!

    My desire to run the Walt Disney World Goofy Challenge started after my first 5K, That’s right before I even ran the Princess Half  I had decided that I wanted to run the biggest, baddest, RunDisney race (at the time) of them all!!

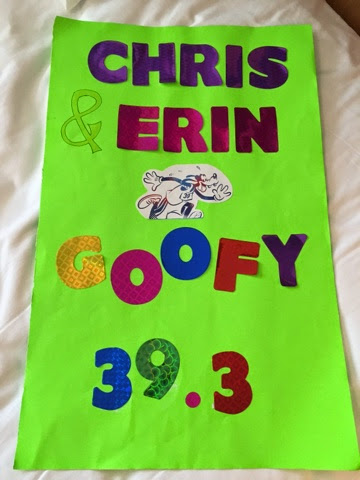
    Goofy’s Race & a Half Challenge! 

    Of course, since then RunDisney has added the Dopey Challenge – so Goofy isn’t as highly recognized as being a big deal… but… Mr. Goof’ I think your race is pretty sweet, and to be honest… Even just part of the Goofy Challenge is pretty tough – and something you have to train for.

    But … enough babble – let me actually talk about the race.

    The Night Before
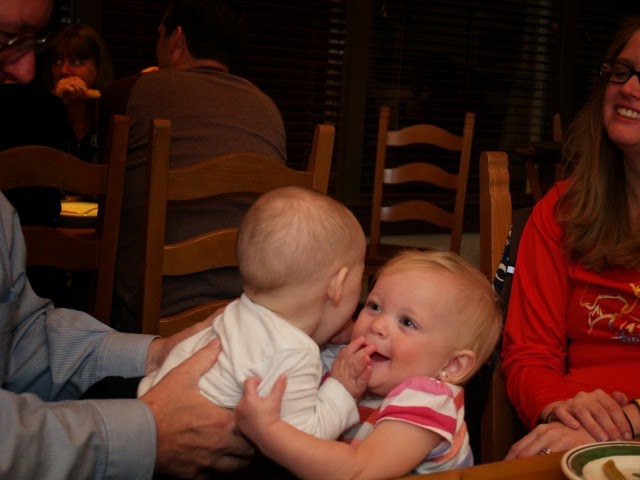
    The night before the race we had dinner with our families (yep.. OUR families) So, my Mother, Father, Sister, and Brother in law. Along with my Mom, Dad, Grandma, Sister, Sister, Brother in Law & Niece all got together at the Olive Garden for some dinner.

    Of course, Little Lady and Little Miss stole the show with their cuteness and I could barely eat. I just didn’t feel good, and nothing on the menu seemed appetizing so… I picked at my food and shared with Little Lady.

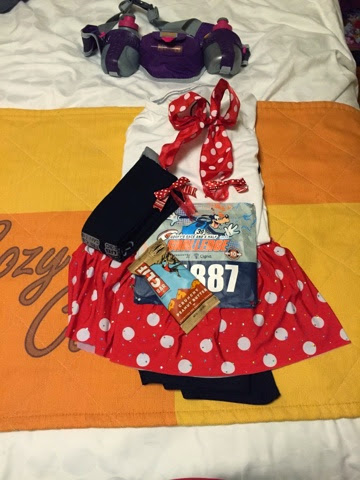
    We got back to the hotel room, organized our things for the race in the morning and went to bed as early as possible.

    The Middle of the Night
    Little Lady had gotten cold in the middle of the night, and so I snuggled with her until the alarm went off and it was time to get ready to go!

    Little Lady was snuggled warmly on our bed, and we began to get ready to go. I felt really stiff so I grabbed my headphones and my iPhone and went through a Yoga Sequence (Yoga with Adrienne).

    Pre- Race
    We were in Corral O, which is pretty much the last corral to start. I mentioned that there was whining before the half, and honestly… what’s the deal?  To block out the noise around my I put some music on and tried to get my nerves in check before the race.

    Miles 1-5 
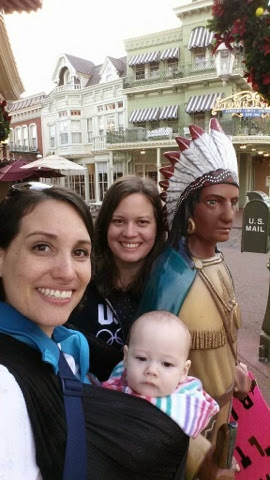
    Just like the half, these miles seemed to FLY by. We didn’t really go FAST, in fact, I was a little dehydrated, so I had to drink a little more water than I wanted to in order to avoid a cramp. So, an extra bathroom stop became necessary – which made our time a little slower. My sisters and niece had decided to follow us along the course – it was a HUGE surprise to see them when we turned onto Main Street. I almost cried, because… there it was… The castle, and my sisters cheering me on!
    I defiantly had an “is this real life” moment.

    Miles 6-12
    A blur… I stayed so focused on my 1 min walk / 1 min run ratio, and was determined NOT to get swept, I just buckled down and ran. I will say, I do remember this being a really boring section of the course. A special thank you to the employee in the Animal Kingdom the words “course to the left, bathrooms to the right” sounded so beautiful to this preggo.

    At mile 12 I ate a Clif Bar and treated the second half of the course like “just another half marathon”. I think breaking it down like that really helped me.

    13.1
    As we crossed the Half Marathon mark I heard a lady say her friend was swept at mile 10. I got scared… Truly – it lit a fire under me because I was NOT ready to be swept. I’d trained too long and hard for this, I WOULD finish.

    13.1 – 17
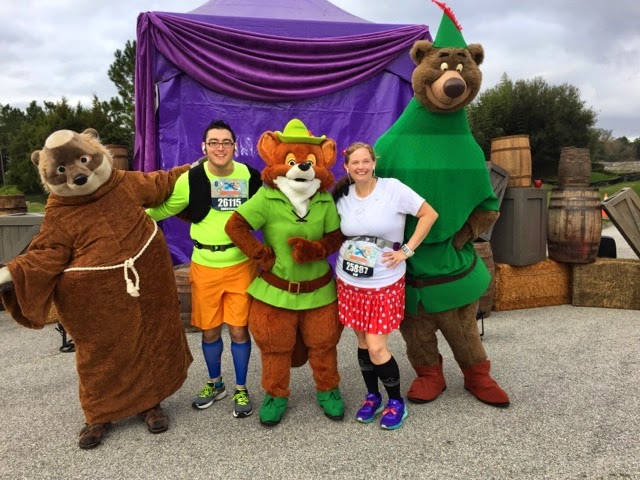
    So,  this was another really boring part of the course. My husband saw Little John from REALLY far back and ran ahead to get in line. Robin Hood is his FAVORITE Disney movie, and he’d never seen Friar Tuck out for pictures. So, we waited in line.

    He didn’t know about what I overheard, and how terrified I was of getting swept.

    Also during this stretch, someone tapped me on the shoulder and said “I know you”, at first I was a little surprised because I was so focused on my intervals I wasn’t sure if he was talking to me, but it was pretty neat to be recognized.

    Mile 17.
    Is there anything as disheartening as seeing the mile marker for mile 17, then a BUNCH of people turning into the road that leads to MGM at Mile 21 right next to you? Yeah, don’t think so.  I’d noticed it but didn’t want to think about it. Until some total stranger taps me on the shoulder and says “THAT’S MILE 21, AND WE ARE ONLY JUST AFTER MILE 17” … I could see ESPN Wide World of Sports, and I knew it’d probably be a scenic 5 miles, but … now all I could think about was how many miles we had left and how much I had to use the bathroom (again!).

    ESPN Wide World of Sports
    We made it. The Wide World of Sports, full of interesting things to look at, a banana fuel station, a cold wet towel, lots of people cheering you on – it was a dream. I (sadly) had to pee SO badly. Our time suffered greatly because we waited about 5 minutes for a bathroom. Annoyed almost to the brink of tears, I held it together. During the WWOS we also ran the track that we’d just run for the kid’s races, so naturally, I started thinking about Little Lady about how much I missed her, and how someday I’d get to tell her and the little love bug inside of me all about our first Marathon. The two of them were such a big part of it – I guess mile 19 brought out the sentimental side of me?  We saw my sisters again, and got some more hugs and were on our way.

    I’d saved a FunSize Hershey bar for mile 20 celebration. I knew if I made it to Mile 20 without being swept, I could do it!

    Mile 21 – 24
    We finally made it to MGM and the volunteers never looked more fabulous with buckets full of chocolate for us back of the pack runners. (One of the fuel stations was empty before we got there) We moved pretty quickly around the park and before we knew it, were on our way to the Board Walk. As soon as I saw the boardwalk I got so emotional.

    Why?
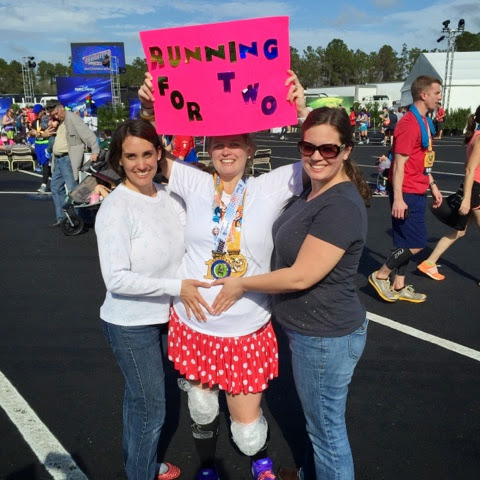
    1) I just ran a WHOLE lot of miles with a 25-week baby bump – I’m allowed to get emotional.
    2) The crowd on the boardwalk was vibrant! So many runners with their medals, and families, and people with “way to go” signs.
    3) We were almost “safe”

    Mile 24-26.2


    As soon as we turned the corner into the World Showcase of Epcot, I could NOT stop the tears. I’d made it. Only 2 more miles until I was given the title of “Marathoner”. I’m not talking pretty tears, I’m talking big ugly tears. Through the rain, humidity, and COLD we followed the Galloway Run/Walk, and we had done it. About the same time we made it to Epcot I noticed my watch had died, so we just did what felt good for the end. 

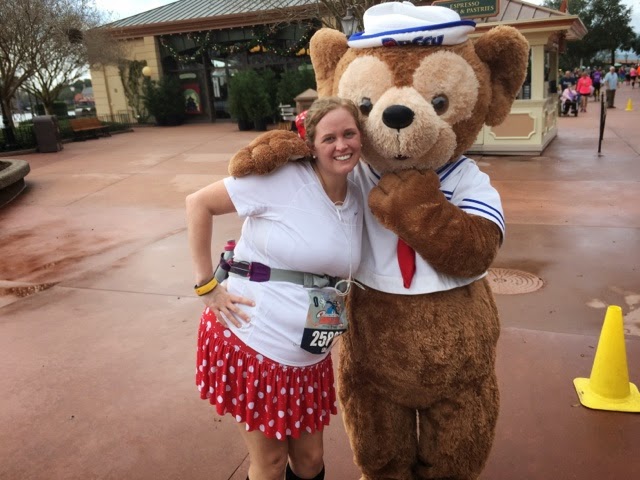
    We soaked in the energy from the crowd, high-fived small children, and waved to people on the sidelines, and then as we approached the finish line we smiled and waved at our families and I blew some kisses to my dear friend Lena who came to cheer me on.

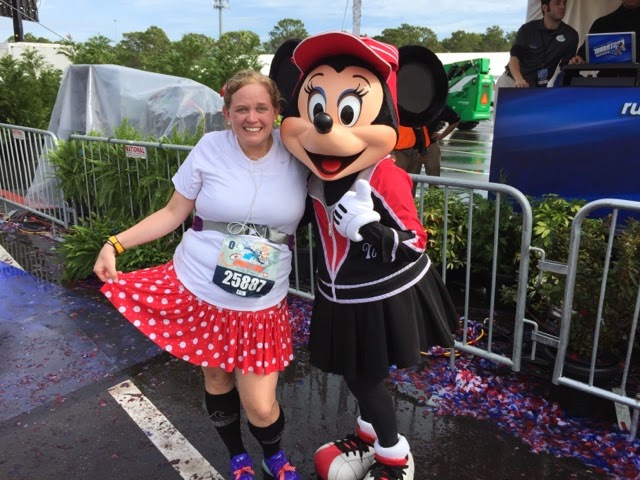
    A hug from Minnie Mouse, and we crossed the finish line.

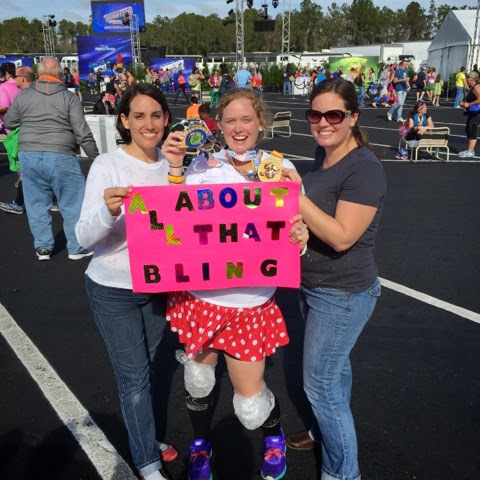
    Goofy Challenge Finishers.

    Never in my wildest dreams would I have imagined I would be running a Marathon. Never would I have imagined I’d run a Marathon at 25 weeks pregnant, but sometimes dreams change.

    I’m so thankful for the opportunity to complete the Goofy Challenge without anything more than bruised and ugly toenails.  My husband was my constant beacon of love and support, I knew he believed in me and together we could cross both finish lines for the goofy challenge. 

    I’m also thankful for our families who supported us, watched little lady for us during long training runs, fed us when I was too tired to cook, and came and cheered us all the way to the finish line. 
    Purchase your Minnie inspired tutu here!*

    We are truly blessed. 
    Now, to focus on havin’ this baby in just about 13 more weeks… 
    *This post contains affiliate links, this costs nothing extra for you but your support of StorybookErin.com is greatly appreciated. 😉

    WDW Wednesday: Magic Kingdom with Toddlers

    Hi Pals! 
    As a Disney loving mom of three young children, I’ve learned so many hacks to having an amazing day at The Magic Kingdom. Today on the vlog I share a few of my favorite tips, so I encourage you to take a look. 
    On the vlog, you will find:
    • Where to meet your favorite characters
    • Best spot for a picnic
    • How to get an extra fast pass, and give your toddler the opportunity to ride a favorite ride twice
    • Tips for having a memorable conversation with your favorite princess
    See ya real soon. 

    Tips for taking your Toddlers to the Magic Kingdom – AFTER Bedtime!

    Hiya Pals!

    In an attempt to capture as many beautiful memories of the days when we traveled through Disney with three toddlers, I have brought my Youtube Channel back to life!

    In my most recent vlog, I share several tips on how to have an amazing time in the Magic Kingdom with your toddlers after they are typically in bed. My top three tips are listed below, but lots of cute family moments are captured in the vlog, I hope you’ll take some time to check it out!

    Tip 1 
    Make sure children are well rested. Since we live about 5 hours from Walt Disney World, our children are often asleep most of the time we are driving. Since it’s next to impossible to get them to go to sleep once we get to our hotel room, we opt for a few hours of fun in the parks. 
    Tip 2
    Have a plan. 
    For this trip, we decided to grab fast passes for the Princesses and Peter Pan because those activities typically have a long line. In order to make the most of our evening, we only did things located in Fantasy Land. This helped maximize our time inside the parks. 
    Tip 3
    Utilize the Baby Center! 
    Prior to leaving the park, we like to go change our girls clothes and give them a snack. It’s quite a journey back to your car from the Magic Kingdom, so the baby center is a great way to get all our things in order before heading to our hotel. 
    What are are some of your favorites tips for having a great evening in the Magic Kingdom? Share them in the comments! 
    PIN FOR LATER 

    Current Favorite (Free) Workouts!

    Who has time for DVD’s? – Not this momma! That’s why I’m obsessed with streaming workout routines from Youtube! Today I’m going to share two of my favorite Fitness Channels on Youtube!

    POP Pilates

    I’m fairly new to the POP Army, but when I saw several amazing momma friends on Instagram using the hashtag #POPARMY I wanted to check it out. POP Pilates was developed by Casey Ho, she took the everyday fitness routine and created a time of not only fitness but empowerment. I absolutely LOVE her personality and create moves.

    Currently, she is doing a superhero series on YouTube, you’ve gotta check it out!


    This is not the first time I’ve mentioned YWA, truth is – she’s my absolute favorite Youtube Yogi! Her videos are perfect for someone who has never tried yoga before but would like to get into it. The way she effortlessly explains how to move from position to position is amazing and has truly helped build my fitness vocabulary, giving me confidence during more advanced fitness routines!

    I like to go through her Pre-Run routines before a run to help get me stretched and ready!

    Let’s Connect!
    Tell me about your favorite fitness routines, who do you follow on Instagram that inspires you? 

    Budget Friendly Beauty and the Beast Party!

    Beauty and the Beast has such a special place in my heart. When it was released in 1991, I remember going to the movie theater with my neighbor to see it. It was such a big moment for me because it’s one of my first memories of going somewhere without my parents or sisters.

    For my birthday that year I got some Beauty and the Beast Sheets, that I still have and use. So, to say I’m fan of beauty and the beast might be an understatement.

    I tried not to host a Beauty and the Beast (BatB) party for our daughters first birthday, in fact I really wanted to host a Fiesta and serve tacos and play Uno. However, my husband was completely not on board with the idea so we went with BatB.

    Her name does have Belle in it… so it was the obvious choice!

    If you are looking for specifics on how to save money on hosting a Disney inspired party, check out my Rapunzel party post, it’s got lots of great tips and ideas. This post applies the same concepts, and will hopefully give you some inspiration for your upcoming celebration.

    Menu

    As you can see, we kept the menu quite simple with a few uniquely themed items. Everyone enjoyed themselves, and since we kept the menu very basic all the kids ate very well too!

    Try these at home! 
    In keeping with the rose theme, I attempted to arrange the meat and cheese like a flower.

    The Grey Stuff – It’s delicious!
    Try it at home! 
    “Snow” covered Fruit 
    Our little Belle, enjoying her muffin! 

    Activities

    Birthday parties for very young children have the potential of being a little overwhelming for the one being celebrated. In order to ease the awkwardness, we have started doing an activity for the adults. For this party, I created a trivia game and gave the guests 2 minutes to complete it.

    In addition to the trivia game, we made a slideshow of photos and had it playing on the T.V. This is a great budget-friendly way to share pictures from your child’s year without printing several copies of photos. 
    Costumes
    I purchased a few BatB patches from this etsy shop, and ironed them into white shirts for the girls to wear. Unfortunately, I don’t have any photos because the girls refused to wear them.  The patches were nice quality and the shop owner was very friendly and easy to work with.
    For Belle, I purchased a blue shirt, white ribbon and felt. This created a Belle costume for less than 5.00 with supplies purchased from my local wal-mart. 

    I hope this post inspired you to think creatively when hosting a Disney inspired event. I love Disney events, be sure to tag me in your Disney inspired celebration on Instagram, @StorybookErin! 

    _ _ _
    PIN FOR LATER 

    Navy-Air Force Half Marathon, Race Recap

    September 17, 2017, I attempted to run the Navy-Air Force Half Marathon, and literally, everything that could go wrong did and there is no one to blame but myself.  I should have known better, especially after the Mount Dora Half experience... but I didn’t learn. 

    So, here are my 3 ways to ensure a HORRIBLE race. 

    1. Neglect your Training. 
    I have EVERY excuse available:
    • Three Small kids
    • Hot Weather
    • Hurricane 
    • Lack of Sleep
    • Lack of Motivation
    • ….
    However, if you register for a race, and want to have a fabulous time at the event. Do not neglect your long runs. Unfortunately, I wasn’t able to get out the door for a few long runs before the race and then we were trapped inside while #hurricaneIrma moved through my beautiful Florida so, I just wasn’t as well trained as I was intending to be – and I paid the price for it.  
    2.  Forget to Hydrate
    The day before this race we had the opportunity to go to an Air Show on base with our friends. It was an AMAZING experience, truly a highlight of my trip to Washington D.C. However, I didn’t drink enough water the week before the race, nor the day before the race. So, when I got to mile 3 and found myself throwing up, I was in tears. 
    I called my husband in tears and told him I wasn’t going to be able to finish the race. I talked to him about possibly switching to the 5-miler, but hadn’t made up my mind.  I decided to stick with the half-marathon but in retrospect, I should have just quit after 5 miles. 
    In addition to being under-hydrated, the temperature and humidity levels were a lot higher than I anticipated. To be honest, it seemed a lot of runners were struggling with the weather that day.
    A post shared by Erin ✨ (@storybookerin) on

    3. Ditch your PLAN the night before…
    :: Face Palm::

    I really wanted to get my P.R. (Personal Record), like… really bad. A few weeks ago, I was on track to accomplish that goal. However, life happened and my training went from consistent to non-existent.

    I am a #gallowayrunner. I am literally always singing the praises of Jeff Galloway’s method of running and training. If you’ve ever talked to me about running or getting started with running I probably told you to do the Run/Walk/Run Method.  – I believe in that method, it’s the method I use…

    Except when I lose my mind over a silly goal…

    In my quest for a 2:40 Half Marathon, I messed with my intervals. Right before going to bed I changed my intervals from 1:00/1:00 to 2:30 Run /:45 Walk.

    Have I EVER done that for a long run?
    nope.

    Mile 3 was about the time I couldn’t keep up with the intervals anymore and EVERYTHING caught up with me. The lack of sleep, lack of water, lack of common sense when setting up my intervals – so disappointing.

    Did I accomplish my goal?
    Not even close…

    My final time was 3:29:10
    Almost a solid hour longer than my goal.

    Final Thoughts on the Navy-Air Force Half Marathon

    Course: Loved it, Running is such a great way to see a city – I absolutely loved the course.

    Packet Pick up: It was well organized, had plenty of booths for people to shop. The only disappointment for me was the location. Last year when my sisters ran it they got to tour the Washington Nationals Stadium, this year it was outside in a tent.

    Race Day Organization: There was a little bit of confusion at the start, people all seemed to be kind of lost, and not really sure what color bibs were intended to go first…? I felt more pre-race communication would have been helpful.

    The other issue I had was the start/finish line was really far from post-race water, snacks and bag check.  In all other runs I’ve done, the finishers exit through a shoot and are guided to the beverages and snacks – this race was not like that.

    The Bling: I loved the medal. Such a great design, and if you look closely you can spot some glitter – and we all know how I feel about sparkles!

    Would I run it again?
    I think so, the race was a lot of fun.

    The question of the day: What race is on your bucket list?

    MOTHERHOOD DIARIES: When your last baby turns 1.

    It seems as quickly as we entered into the season of life that includes parenting babies, it has vanished. I’ve never exactly shared the struggles we faced when trying to conceive, but it was a struggle and on May 21st, 2013 when we FINALLY saw the words “pregnant” we were over the moon excited! (Baby Number One) 15 months after baby number 1, we welcomed our Love Bug. Life was hard, we welcomed our sweet and spunky second born into the world and then moved away from our support system a few days later.

    February 2016
    I remember going to the grocery store and purchasing a box of cereal, coming home, standing in the kitchen and eating it – The.Whole.BOX!
    “That was strange” I thought to myself, I don’t even like cereal.
    Let me go buy a pregnancy test…
    Negative.
    “Are you feeling okay?” – someone randomly asks me
    Yes, I think so…
    “Are you still running?” – another person inquires
    …Yeah,… I mean…when I can… am I getting pudgy? I wonder silently to myself.
    Let me go buy a pregnancy test….

    5 Pregnancy tests, all negative.

    Then, on February 11, 2016 I took 2 more tests.

    Both positive.

    It was you, my sweet little Belle.
    Our last baby. 

    This week is your last week as a baby, and my last week to snuggle you as a baby. Soon you’ll be a toddler.  You will become more and more independent, and although I want to hold onto these sweet baby memories I am excited watch my three toddlers grow.

    How #HurricaneIrma affected my Marathon Training

    Marathon Monday   Thursday!

    If you’ve been following my blog for any length of time you are probably aware that I am located in South Florida, and I have three of the most amazing kiddos in the world! I, like EVERYONE in Florida watched Hurricane Irma grow in strength and uncertainty for several days, and began to prepare.

    Between organizing a baby shower for my niece (coming this fall), and preparing my house for Irma, I haven’t had any spare energy or time to get out the door for my training runs but here is what I have been doing.

    I purchased comfort items, such as non-perishable chocolate milk so my three year old would be able to sleep a little easier when the power went out.

    I purchased lots of fun snacks, packed puzzles, NEW crayons and little toys for our evacuation to Abuela’s house.

    I practiced putting a baby carrier on in a hurry in case we had to run to a closet if we were in the path of a tornado, or other extreme weather.

    I got down on my knees and prayed for wisdom and guidance as we watched Irma.

    I taught my girls a memory verse to recite to themselves when they were afraid, but if i’m being honest… it was really me who was afraid.

    A post shared by Erin ✨ (@storybookerin) on

    I gave my girls jobs to help them feel a part of the preparation, and took the time to talk to them about Hurricanes.

    A post shared by Erin ✨ (@storybookerin) on

    and once the storm passed, and we were among the first to have power we opened our home to family and friends who needed a place to cool off, take a shower, charge their phones or just relax.

    I’ve never been afraid of a hurricane like I was for Irma, but I am so thankful for the many people who reached out to let me know my girls were in their prayers. Your kindness gave me such peace, I could never express how much your kindness meant to me.

    A post shared by Erin ✨ (@storybookerin) on

    To the many in Florida and beyond still without power, and working hard to find “normal” after the storm, you are in my prayers. 
    Have Courage & Be Kind.

    DIY Disney: Vanellope Von Schweetz Costume

    Hello everyone! I am Dana, Storybook Erin’s sister. I ran the 2017 Goofy Challenge, with our older sister and had an adorable costume inspired by Wreck-it Ralph so, I was asked to share how I completed the look while sticking to a very small budget!

    Character Inspirations

    • Vanellope von Shweetz
    •  Taffyta Muttonfudge

    After hours of searching the Internet for easy costume ideas and only finding 2 tutorials, (Both were outside my current skill level, and more effort than I wanted to put into a costume). I realized that I could just paint on the details!

      My solution for the shirt was simple and cost less than $5.

    The Shirt

    My local Salvation Army sells all clothing for 50% off on Wednesdays, so two Wednesday in a row I went and scoured the racks. I found a short sleeve shirt with a v neck design similar to a hoodie. Next, I purchased fabric paint and polymer clay from Michael’s, so I could put the finishing details on the shirt.

    Instructions

    1. Lay the shirt on the table and use a sheet of paper to help with placement and sizing
    2.  Fold a corner of the paper down to choose the angle of the pocket
    3.  Folded the paper in half and cut the angle. 
      • Now you have a pocket stencil!
    4. Put a piece of cardboard or paper bag inside the shirt 
      • This prevents the Sharpie from bleeding through
    5. Unfold your newly made custom stencil and place on the shirt
    6. Draw a line around the stencil with Sharpie
      • PRO TIP: To prevent the sharpie from catching on the fabric, try to stipple the line on. 
    7. Paint on additional details with pink fabric paint and let dry! 

    I have continued to use my Vanellope shirt for several training runs and the paint is holding up well, even with an accidental trip through the dryer!

    The Hair Accessories

    I used polymer clay to make the hair candy according to the direction on the clay packaging and super glued the pieces on to clips. The super glue did not hold well. I had enough usable pieces on race day, but I do not recommend using super glue for the accessories. A glue gun may have worked better, but I did not have access to a glue gun while crafting my hair pieces.

    Another option I thought of for the hair pieces would have been to sew buttons onto a sweat band and use two red pipe cleaners twisted together for the look of red licorice.

    Supplies Needed w/ Cost!

    • Shirt ($2.00)
      • Thrifted
    • Pink Fabric Paint ($1.39)
      • Michaels 
        • Don’t forget to grab a coupon from their website!
    • Hair Clips ($3.50)
      • Walgreens
    • Polymer Clay x 3 ($5.07)
      • Michaels
    • Red Pipe Cleaners (FREE)
      • Personal Craft Supplies 
    • Sharpie (FREE)
      • Personal Craft Supplies
    • Brown Sparkle Skirt ($25.00)
    • Silver Sleeves ($22.00)
    • Visor ($25.00)
    • SockWell Compression Socks ($25.00)
      • Amazon.com


    Shirt and Craft Supplies Total 
    11.24 + tax


    COSTUME TOTAL 83.94 + tax

    Total I spent almost $100 on my outfit. However, when you remove items purchased from Sparkle Athletic, the total cost was less than $12.00.  

    Sparkle Skirts, Socks, Sleeves and Visors are absolutely reusable, and the quality of Sparkle Athletic items is excellent! Be sure to subscribe to their mailing list to be alerted of any sales or new products, I purchased my first sparkle gear during a Christmas in July sale.

    I hope this post inspired you to think creatively when putting together a costume, I’d love to see your creations! So please tag my sister’s Instagram if you decide to make this costume!

    Shop the Look*


    PIN FOR LATER 

    How to Host a Tangled Party on a Tiny Budget! – Part 2

    I recently shared about our daughters Rapunzel party, and how I did the whole party on a TINY budget. I thought I’d take some time to go over the DIY’s we did, and how we saved some money during the process.

    DIY Sun Stencil

    When hosting a Tangled party it is impossible to skip over the detail of the sun. The image of the sun is painted throughout the movie, and I wanted it to be a part of our party. I thought about ordering a cookie cutter of the sun that we could use as a stencil and then make cookies. However, we decided to create a stencil by using a printed out image of the sun, glued it to card board and then used an exacto knife to cut it out.

    It worked out well and we made lots of different banners with our simple stencil.

    DIY Wanted Posters

    Another detail I wanted to incorporate into the party was the Wanted Posters.  For this, we simply purchased white and brown paint poster pant. We used a car seat box for the signs, and then set up a photo booth. It was a lot of fun to see all the photos at the end of the party.  

    DIY Hair
    We hosted the party in my in-laws beautiful back yard. Ever since the pergola was completed, I couldn’t wait to decorate it for a party! Rapunzel’s hair was the PERFECT thing to do just that.  
    Originally I thought I would purchase several yellow table cloths and braid them into a long piece of hair. However, the longer I thought about it, the more complicated that seemed to be. So, we purchased a large roll of yellow plastic table cloth and cut it into three strips. 
    TIPS FOR BRAIDING 100 FEET OF HAIR
    • Unroll the Table Cloth 
    • Cut into three strips
    • put a rubber band around one end 
      • have 1 person hold the end 
    • three people will then braid the hair loosely 
      • much like in the film 

    More Hair

    We also incorporated Rapunzel’s hair into the food and beverage table. At my local walmart, yellow yarn was only .50 a package, so I purchased several packages and made several braids, and wrapped the yarn around baskets and then I hot glued a three onto a picture frame as additional decoration.  


    Tsum Tsum’s

    I found several Rapunzel Tsum Tsum’s on clearance at a Disney outlet store a few months before the party, so I just pulled them out of the toy bin and placed them around the party for additional decoration. 
    Cake Topper
    My sister in law’s wedding theme was “Best Day Ever”, and she was kind enough to allow us to use her cake topper for the wedding – it was such a beautiful touch. Instead of ordering a speciality cake, we just picked up a simple cake with flowers from the grocery store. 
    As you can see, the party was put together with very simple materials but, in my opinion looked beautiful! 
    Happy party planning! I’d love to see photos of your party, be sure to tag me on instagram so that I can see them! 
    _ _ _
    Suggested Party Supplies*

    * affiliated Links 

    How to Host a Tangled Party on a TINY Budget.

    The Setting 
    It’s two weeks before your daughter’s third birthday, and you have spent months planning all the Mickey Mouse Clubhouse DIY’s you are going to do for your daughters birthday. The last thing to do is buy the supplies and your daughter a cute new dress.

    You log onto Amazon.com with your daughter to pick our a Minnie mouse dress and she asks “Where are the Rapunzel dresses for my Rapunzel party?”

    Um… What?

    Yes, that actually happened to me and I literally had 1 week to switch gears, and get my daughter’s Rapunzel party pulled together on a budget!

    Step 1: Set a Budget
    If you want to host an amazing party on a lower budget, it’s important to SET a budget with your spouse or co-party planner. It’s crucial to have open communication about the budget and keep track of your spending.

    Step 2: Head on over to Pinterest!
    I spent a few hours one-afternoon pinning ideas and writing out a shopping list.
    Check out our planning board here.

    Step 3: Know your DIY limitations
    I got really inspired on Pinterest and wanted to do so many things. However, we were on a budget and short on time so I really had to pick and choose. As much as I wanted to make lots of lanterns and hang them on the pergola, I knew I couldn’t get it done. So, I spent my time braiding yarn and making lots of banners with our stencil (made from cardboard).

    Step 4: Simplify.
    There are SO many wonderful and adorable ideas out there, you could host the same theme party every year until your child turns 18 and never have the same decorations. That’s the beauty of Disney, there are so many ways to create a beautiful party.

    Don’t get overwhelmed. Simplify your decorations, and only emphasize one or two things.  For our party, we emphasized Rapunzel’s hair and the color of her dress (purple).

    Step 5: Relax and Enjoy
    Don’t fuss over what could have been different or better. As soon as your child see’s the party all put together, I invite you to embrace the moment. Make the day special and beautiful for them. My daughter absolutely LOVED her party, and spoke about it for months after!

    Embrace the moment, capture the smiles and give the gift of your PRESENCE.

    Wishing you THE BEST DAY EVER as you celebrate the Tangled Fan in your life.

    If you are interested in the details of how we accomplished the DIY’s, I’d be happy to go into more detail! Just let me know. 

    Read PART TWO Here! 


    Is Aaptiv worth the investment?

    I was so thankful for the opportunity to preview the fitness app Aaptiv for a few weeks. The timing was ideal as I just started Marathon training, and am always in need of motivation.

    What is Aaptiv?

    We founded Aaptiv with the goal of bringing an elevated workout experience to a global community. We use technology to make that experience accessible anytime, anywhere – whether you’re working out at your local gym in LA or running outside while traveling in London. – source

    Aaptiv provides audio classes for you to listen to right from your own home or gym. These classes are hosted by a professional trainer and incorporate motivational music throughout.  There are many classes to choose from, no matter your fitness level or how much time you have to squeeze in a fitness routine there is something for you. 
    Classes Include: 
    • Core Workouts
    • Running
      • Outdoor
      • Indoor
    • Running Training Plans
      • 5K
      • 10K
      • 1/2 Marathon
      • Full Marathon
    • Walking
    • 7-minute Quick Hits
    • Elliptical
    • Strength Training
    • Indoor Cycling
    • Stair Climber
    • Yoga
    • Stretching
    • Meditation
    • Programs & Challenges
    • NEW Maternity 
      • Prenatal Classes
      • Stroller Workouts

    Benefits of Using Aaptiv


    I really enjoyed the trainers, and the coaching. Especially for treadmill runs. I am not a fan of treadmill running. However, it is so hot right now in Miami, that I have to do my midweek training runs on the treadmill. So, having a coach cheering me on, playing great music is a HUGE motivation, and it actually keeps me on the treadmill. 
    Now that I’ve played around in the app, and taken quite a few classes, here is a quick list of benefits I found with using Aaptiv
    • Portable
    • Access to Trainer Bio’s
    • Current Music
    • Motivating Trainers
    • Ability to Favorite classes
      • set reminders
    • Ability to share workouts with your favorite social media accounts
    Things I didn’t LOVE about Aaptiv
    Overall, I was very happy with the app. I was really motivated by the trainers, and even found my running speed increase through the help of the app. However, I like to share my honest thoughts with my readers and felt it important to share a few things that I personally didn’t love.
    • Calorie Tracking / Mile Tracking
      • Since you don’t put in your actual weight nor GPS location, there is no proof that you actually kept pace with the class. Therefore, your app will day “ran 2.0 miles” but in reality you may have only ran 1.5
        • not a huge deal, but for someone who likes to keep records of miles and pace, it can be a little frustrating.
    • All Audio / No Video 
      • Since this is an Audio App, there is no visual demonstration of moves. Obviously, it’s an Audio app. However, I felt like because of the lack of visuals it could be a little intimidating for someone who was new to working out. For example, I listened to a couple of the *Newly Launched* prenatal fitness routines with my sister in law, who is currently expecting, and she had many questions on the moves.
    How much does Aaptiv Cost? 
    • Monthly Fee 
      • 9.99
    • Yearly Fee
      • 99.99
    • Lifetime Membership
      • 399.99
    Is it worth it?
    I go back and forth on this question, and ultimately I think it is a good investment for someone who is looking to have access to classes and coaches without re-arranging their lives to attend the classes. This would be ideal for someone who is in college, or lives in a neighborhood and has access to a gym with many types of equipment but lacks the motivation to get on a machine and workout. 
    If you have the money in your budget, and have made a commitment to yourself to workout – I say YES, YES, YES!! This app is absolutely a great thing for you to have. However, if you are more on a budget, or just getting into fitness and learning the lingo this might not be the right time for you to invest in this program.  
    Interested in checking out the classes, or the NEWLY LAUNCHED MATERNITY WORKOUTS, go here for a FREE 7-day trial! 
    Some of my favorite classes included:

    • Yoga / Stretch  
      • Prepare of Sleep
      • Runners Stretch
      • Chill Vibes, Evening Stretches
    • Running 
      • Move, Dance, Run It Out
      • Drip Drop Hills

    MOM HACKS: Postpartum Hair Loss & Regrowth!

    Remember when you were pregnant, and everything seemed to glow? 
    If you, like me, find yourself sweeping up enormous amounts of hair from you floor, or constantly cleaning your shower drains and vacuum cleaners, fear not. 
    You are NOT alone. 

    Our hair goes through different cycles. There will be times when your hair is in a state of rest, and then will shed. According to what I’ve read, when you are not expecting, you loose about 100 hairs a day. However, once you become pregnant, your body slows down the cycles. Thus, keeping those 100 hairs nicely on your head.

    Once your beautiful baby is born, and your hormones start to go back to normal… the cycle returns and your hair begins to fall. With all three of my pregnancies, this happened between 3-5 months postpartum. It’s quite unfortunate that just about the time I was feeling like a human, and getting the hang of motherhood my hair started falling out.


    Now that I’ve gone through this process three times, I thought I’d share my tips and tricks for handling the postpartum hair loss chapter in your journey through motherhood. 
    1. Embrace it. 
    • My mantra for this season of motherhood, is you are not alone. As with many of the unfortunate side effects and experiences with giving birth, this is just for a season. You are not the only one to deal with it, and even though when you look in the mirror you feel like you are going totally bald, just think of the precious child you brought into this world and know you are amazing and to that little one, you are the most perfect and beautiful woman they’ve ever seen. 
    2. Brush Gently. 
    • Treat your hair very gently. Yes, the hair is going to fall – it’s part of the cycle. In my experience, my scalp was very sensitive and using a brush just seemed to make the hair fall worse and it didn’t grow back any faster! So, I used a wide tooth comb and only brushed it when it was completely dry. 
    3. Soft hair styles. 
    • You may find that putting your hair up in a pony tale or bun with elastic or bobby pins pulls on your hair and causes discomfort. So, my go-to hair style in the midst of my hair loss was very loosely clipped into a bun, or loose braids.  This seemed to help me not feel like I was going bald, and that I made an effort on my appearance. 
    4. Stimulate your Scalp 
    • After my first daughter was born, I used a shampoo infused with tea-tree oil and other oils that are great for stimulating new hair growth. It was one recommended to me at the Salon and I did find that I noticed a tingly sensation, and my hair began to grow back pretty swiftly.  After baby three, I turned to essential oils once again and have been seeing success with them.  I’ve been using what I refer to as my “Rapunzel Blend” and have been seeing lots of new hair growth! 
    Recipe for the Rapunzel Blend
    20 Drops Rosemary Essential Oils
    20 Drops Lavender Essential Oils
    10 Drops Peppermint Essential Oils
    The Rosemary and Peppermint are excellent for stimulating the scalp for new growth, and the lavender is a nice calming gentle oil that helps keep your scalp healthy. 
    How to Apply the Rapunzel Blend
    • Add a few drops to your shampoo and massage into the scalp
    Pro-Tip: I like to wash my hair in the evening and find that the aroma of peppermint and lavender assist with relaxation and tension. 


    MOMHACKS: Styling New Hair Growth 

    Let’s face is, new hair growth can be awful to try and style. Here are my favorite tips for feeling put together when you have crazy baby hairs! 
    1. Wear a hat – This is my GO-TO option for play dates and going out doors.
    2.  Coconut Oil – just a TINY little bit smoothed onto the new baby hairs will give them some moisture, and help put them into place without use of product
    3.  Gel and Water
      1. After baby number two the regrowth was CRAZY, I would put a a tiny little bit of gel in my hands, rub it together then add some water and plaster those baby hairs to my head. 


    Help your Baby FALL in LOVE with GREENS!

    In the fall of 2013 I was diagnosed with Gestational Diabetes during my first pregnancy I became very interested in healthy eating and pregnancy. Just what exactly do the babies get, can they taste?

    I’m not sure if they can actually taste like we do outside the womb, but tastes are being developed from inside the womb, and eating a healthy diet while you are pregnant is a gift to you AND your baby.

    Once you start introducing solids to baby, I like to start giving greens as soon as possible. My pediatrician chuckled when I told him I wanted to start my first born on Kale as soon as he thought it would be okay.  Around 7-9 months is when I introduced greens to my girls, but be sure to talk it over with your pediatrician when starting any new foods.

    I am thankful to report that my girls all LOVE Spinach and will even have Kale in smoothies from time to time without an argument, and it’s all thanks to this quick and easy recipe.

    Greens Recipe for Baby


    Ingredients: 

    • Spinach (or Kale)
    • Apples 
    Instructions:
    1. Wash and Peel Apples
      • I like to use a variety of green and red apples to make the flavor more interesting 
    2.  Steam Apples until soft
    3. Steam Spinach for about 2 minutes 
    4. Blend 
    5. Enjoy! 
    It’s THAT easy friends!! 
    Why I LOVE Spinach? 
    Spinach LOADED with essential vitamins such as iron, vitamin A, C and so many more.  Just like leafy greens are recommended for healthy digestion in adults, this fiber rich meal can help keep things moving with your baby. 
    I remember with my oldest daughter she would often get constipated when we started introducing solids, every since introducing spinach as a regular part of our children’s diets this has not been a problem. 😉 
    Question of the day: Do you prefer Spinach raw or cooked? 
    I prefer steamed spinach, but my husband prefers raw spinach to be eaten in a salad. 

    (Affiliate Links) My Favorite baby food making products! 

    Ninja Blender: http://amzn.to/2qDsTXO
    Baby food Storage: http://amzn.to/2r1YfZ2
    Space Saver High Chair: http://amzn.to/2rWCeLr
    *This post contains affiliate links, it costs nothing extra to you but does help support our family. 


    PIN FOR LATER 


    Sweet Potato Lentils

    Do you LOVE Lentils? 

    Growing up, I’m sure I never finished a bowl of lentils or requested them like my kids do (sorry mom).  To be honest, if it weren’t for the recommendation of my pediatrician and mother in law I probably would have never considered making them for myself OR my children! 

    With its low in fat, high in protein, iron and fiber properties, this little legume packs a serious health punch for you and your little one. Not only is it super healthy for you, a small bag at the grocery store costs about $1.50, and will last your family for several meals! 

    *When did/do I introduce Lentils to my Children? 
    Around 7-9 months, I begin introducing Beans and other proteins to my children. I follow the recommendation of my pediatrician and do it very slowly.  So far, all three of my children have been EXCELLENT eaters (as babies…)

    *always talk with your personal pediatrician about when and 
    how to best introduce new foods to your little ones*


    MOM HACK:
    Lentils are one of the few legumes that you don’t have to soak overnight before making – so not only is this a great budget friendly meal it’s also quick! 


    Sweet Potato Lentils
    Ingredients: 
    1. Lentils
    2. Sweet Potato
    3. Carrots
    If you are making this for your family and not only  for baby food add some seasonings like Salt, Pepper and Onions. 

    Cooking Instructions:
    1. Rinse Lentils
    2. Fill Pot with plenty of water to cover the lentils
    3. Add Sliced / Peeled Sweet Potato
    4. Add Sliced / Peeled Carrots  
    5. Bring to a Boil and let Simmer for about 45 minutes
    6. Enjoy

    When making this dish for my baby, I like to blend it in my food processor. It gives a nice smooth consistency and the sweet potato gives it a nice creamy texture. The color isn’t all that pretty, but the flavor is amazing!


    This dish is also great for the whole family, you can either serve with some of your favorite rice as a meatless meal, or cook up some pork chops to serve. 

    Lentils have become a family favorite in our home, and I hope they will become a family favorite in yours too! 

    (Affiliate Links) My Favorite baby food making products! 

    Ninja Blender: http://amzn.to/2qDsTXO
    Baby food Storage: http://amzn.to/2r1YfZ2
    Space Saver High Chair: http://amzn.to/2rWCeLr
    *This post contains affiliate links, it costs nothing extra to you but does help support our family. 

    Pin for later…

    The SECRET to a SWEETER Sweet Potato!

    As a mom of three children, three and under I’ve had to develop systems and find ways to make the healthiest and tastiest recipes for my children. I’m no chef, in fact, I personally believe i’d benefit from being on one of the worst chef type shows you see on T.V. However, I have mastered the art of making healthy, and delicious baby food recipes, and I’ll be sharing some of my favorites with you during the month of June!

    My tried and tested way of making the BEST and SWEETEST Sweet Potatoes EVER! Before I give you my secret, I wanted to give a little background on how I used to prepare them for my first born.

    Before I discovered this amazing hack for cooking sweet potatoes, I would spend hours chopping sweet potatoes and squash to either boil or roast and then blend. Making baby food often felt overwhelming because it took SO long. Then, one day read a little secret, and it completely changed my world!

    The longer you roast a sweet potato, the more the natural sugars begin to release and the potato becomes this creamy, yummy dessert WITHOUT adding ANY sugar, or sweeteners.

    So, how does a Mom of three accomplish roasting such amazing sweet potatoes?

    Hello Slow Cooker. 

    Yes, wash those sweet potatoes and throw them in the slow cooker and let them roast for a few hours. It is the PERFECT way to make baby food for your infant, and a side dish for your family.  I use this hack for making sweet potatoes for our family, baby food and even sweet potato casserole.  This hack also works for different types of squash as well.

    In order to make this into baby food, just let it cool for a little while then add to your blender with a little bit of water and blend, it makes the perfect first food for your baby.

    If you are starting to introduce meat to your baby, these sweet potatoes make the perfect addition to
    the meat.

    Instructions for Sweet Potato & Chicken Baby Food

    • Roast Sweet Potato
    • Bake Chicken in Oven 
    • Let Cool
    • In your food processor, blend the chicken
    • Add Sweet Potato & Water and blend until smooth
    We like to mix all our meats with sweet potato or other squashes, and now that I know I can cook them in the crock pot, no more chopping, peeling or spending additional time in the kitchen prepping the food. Making baby food is easier than you think! 
    _ _ _
    My Favorite Products for making Baby Food*
    Ninja Blender: http://amzn.to/2qDsTXO
    Baby food Storage: http://amzn.to/2r1YfZ2
    *This post contains affiliate links, it costs nothing extra to you but does help support our family. 

    Plan with Me: Erin Condren vs. …

    From as long as I can remember I have looked forward to getting a NEW Planner in June, and filling it up with plans, class schedules, due dates, reminders, check lists and all sorts of nerdy things. I kind of felt alone in my love of planning until I ran across some “Plan with Me” videos on Youtube and found that there are whole online communities dedicated to PLANNING!

    These are MY kind of people…

    It didn’t take me long to find the Erin Condren Life Planner and fall literally in love with the versatility of this planner.  After a solid year of using my Life Planner, I have a big decision to make.

    Do I order the new one? 
    Do I keep using this one for the remaining months of 2018?
    Do I ditch EC all together and try something new?

    What’s a girl to do?

    Things I LOVE about EC Life Planners

    • Customer Service
      • The Customer Service is amazing, if you have a question or an issue you can contact them on ANY social Media platform or by calling and they will respond. 
    • The General Line of Products
      • EC has so many adorable products, all customizable and I’m obsessed! 

    • The Layout of the Planner
      • I love how you can decide on Hourly, Vertical or Horizontal to fit your needs. 
    • The Personalization
      • I LOVE seeing my initials on my planner, it’s just so adorable! 
    • Coupons and Discounts
      • EC has a great referral program, where the person who uses your link gets 10.00 and YOU get 10.00 off too.
    Things I don’t LOVE about EC Life Planners
    • The Price. 
      • At over 50.00 per planner, it’s so hard for my to justify the purchase every year. There are great referral programs, but it’s hard to justify for me right now. 
    If I don’t order an EC Life Planner, which will I purchase? 

    One of my favorite planners was this Pocket Planner from Orange Circle Studios.

       
    Things I like about this Planner
    • Small size, perfect for the diaper bag, purse or backpack
    • Economical – At less than 15.00 you can have an adorable planner without breaking a budget
    • Bright Colors and Quotes – Similar to the Erin Condren, it is filled with bright colors and quotes. 
    • The Layout – This planner has a full month view to jot down big plans or appointments, and also has weekly spreads
    • Extra’s – In the back you will find notes pages and pre-made lists such as “books to read” “movies to see” “vacations to take” 
    Another Planner I love and have used in the past is the Lily Pulitzer Planner
    This planner also has lots of fun prints, quotes and even includes Stickers it’s a great choice for the student or mom who loves to have a paper planner.  
    The Final Planner I’ve been looking into and thinking about purchasing for 2018 is The Happy Planner
    I’ve seen this planner all over Youtube and Instagram lately and seems to be very close to by beloved Erin Condren Life Planner. It seems to have plenty of space for me to write my daily to do lists, blog ideas, meal plans and other mom life items. 
    What about you? Do you still use a paper planner to keep it all together? 
    What planner would you purchase? 

    *This post contains affiliate links*

    Running Tips from Jeff Galloway – Motivation

    MOTIVATE YOUR WAY OUT THE DOOR.

    There is a point where every runner needs a little motivation to head out the door. Here is a proven strategy to get moving on the tough days.The method has also been helpful in dealing with other challenges.

    Mentally Rehearse: The following is a mental exercise that you can do throughout the day to prepare for this situation, as you are sitting around at the end of the day, driving, or commuting home. Don’t focus on the workout. Instead, break down the experience into a series of small steps which are easy to do. As you rehearse the sequence of these, over and over, you become more likely to follow the same pattern when you need to do so. Prepare by putting on comfortable shoes and clothes, and having your exercise equipment handy. You’re not thinking about exerting yourself – just getting out of work clothes and into clothes that are comfortable but could be used for your workout.

    1. Coffee? As you are dressing, brew some coffee, tea, or have a diet drink, etc. Caffeine (if you have no problems with it) will wake up the central nervous system, making exercise feel better.

     2. Eat a snack. Low blood sugar is the most common reason for low motivation in the afternoon. An easy-to-digest snack will raise the level so that you feel good and will reduce the negative messages received from the stress-monitoring part of the brain (the left brain).

     3. Weather? Just walk out the front door to see what the weather is like.

     4. If you are using exercise equipment in a health club, check the availability and walk around the equipment until the user has finished his or her workout.

     5. If outside, walk to the end of the block to get your bearings. Once you have walked 100 steps you are almost certain to continue. If using a treadmill, commit to walking 100 steps, then commit to running 100 steps.

     Have a reward afterward, such as a snack, a beverage, or a massage – you earned it!

     There is a principle of lazy physics here:

    A body on the couch wants to stay on the couch. But once a body is in motion it wants to stay in motion.

    See ya at the finish line! 

    *I am a blogger for Jeff Galloway, as such I receive great tips and resources to share with my readers. Enjoy!

    What to Do and How to Pack for your Visit to Shark Valley!

    One of my Bucket List items for 2017 was to explore my city. I moved to Miami in January of 2006, and had never actually been to the Everglades. Of course, I’d driven through it on our commutes between Miami and Fort Myers when we lived there for a year, but i’d never actually explored the Everglades. So, we planned a trip! 
    Over the last year, my husband has been biking to work and so he’s become quite handy with fixing bikes. So, we didn’t need to rent any when we arrived, but there are bikes available to rent if you don’t have a bike or a vehicle large enough to transport one. 
    Shark Valley is located just about as far west on calle ocho (8th Street) as you can go,  not too far beyond the famous “The Pit” Barbecue . At 25.00 per car for entrance into the park, i’d encourage you to make a family or friends trip out of it. 
    Here’s what you’d need for your day at Shark Valley.
    • Cash 
    • Bug Spray
    • Sunscreen
    • Hat / Sunglasses
    • Bike (optional)
    • Water 
    • Snacks 
    • Camera 
    What to do at Shark Valley

    • Ride the Tram 
      • There is a 2 hour guided tour of the park, where you will learn information about the alligators, everglades and wildlife seen on your journey. It’s a good option for guests who would prefer to enjoy the Everglades without biking through it. 
    • Learn from a Park Ranger
      • We attended the Ranger Talk while enjoying our lunch and learned about Birds of Prey. This is a neat experience for children, as the Ranger will pass around Bird Skulls, and Feet for people to hold. 
    • Guided Bird Walk 
    • Guided walk with a Park Ranger 
    • Explore the Welcome Center
    • Stamp your National Parks Passport! 
    • With so much to do, you might consider purchasing an annual pass for the parks! 
    Here’s a look at our first trip out to Shark Valley, I hope you enjoy and give us a thumbs up and subscribe for more fun videos! 
    Know of an interesting park or location we should explore?
     Let us know! 

    Bike to Work Month: Gear up!

    Welcome to Part 2 of my BIKE TO WORK series!

    No matter what you do, it is important to have the right gear. However, a trip to the bike shop can be intimidating. Luckily, there are some very basic things that every cyclist needs to get started.

    The Essentials

    Get a Bicycle

    For real. You need it. I started out by borrowing my brother’s bike. It was an old salvage job that sat out in the weather for a while. It was really hard to ride and always had some kind of problem. However, with a $0 investment fee, it was perfect for starting out.

    But eventually you will need to put your money where you mouth is (or the seat of your pants are…) and buy yourself some real gear. Since the bicycle is going to be your most expensive investment, it’s important to make an informed decision. There are several factors that you should consider, like:

    • Is this for commuting, exercise, pleasure or some combination?
    • How much bike maintenance are you comfortable doing? 
    • How portable does your bicycle need to be?
    • Brand
    Here’s how I answered these questions:

    What’s it for?

    I decided I needed to buy a bike that was primarily for commuting. Sure, I’ll use it to ride for pleasure, but I do not use it as an exercise bike per se. That cuts out those touring and mountain style bikes. I wanted something stable and simple.

    Also, I wanted fenders. Without them, I’d be wearing the road on my legs. Dirt, mud, water–everything would be liable to splash up on me. I needed fenders on my bike. Either they needed to come with it or be installed after the fact.

    Maintenance

    I wanted something I could easily maintain. Here’s a general rule of thumb: The more moving parts, the tougher it will be to maintain. I chose a single-speed bike with a single brake lever. There’s only one gear to worry about and no derailleur. This means the gears, the chain, the tires, the tube,… everything is easier to take care of right off the bat. 
    That’s not to say everything worked out perfectly with no hitch. I found ways to make things complicated. But, could you imagine if I had bought a bike with more parts?

    Portability

    I wanted something super portable. It had to be lightweight so I could carry it up stairs if needed (done that). I wanted to be able to load it in the SUV if my wife came to pick me up (done that). So I settled on a folding bike.
    Yes, folding. I can fold the handlebars down to the front wheel, fold the front wheel back to the rear wheel and slide the seat all the way down. After that, I can take the bike into my office or slide it in into the back of my SUV. Pretty cool!

    Brand

    Like the car you choose to deliver you safely across town, the bicycle brand you pick is pretty important. I found that Dahon is one of the leading manufacturers of folding bikes. So I chose the Dahon Boardwalk for my ride. It looks a little funny, but I enjoy the aesthetics and it suits my needs.
    Remember that guy who is the dad of the Penn-State cyclist? He approved of the purchase.

    A Helmet

    No, persons over the age of 16 technically are not required to wear a helmet. But they should. I have had several close calls over the year (too many to count) and I have been hit once by a car (she said she didn’t even look my way). So here are my safety rules. I only have two.
    1. Always wear your helmet.
    2. Always assume they didn’t even look your way.

    A Bag

    I recently purchased a pannier bag. They are basically saddlebags that go on your bicycle’s carrying rack. I haven’t developed an opinion yet, but I can tell you that I arrived at work with less sweat on my back.
    However, when I started I bought a simple Adidas backpack. It was waterproof, had discrete compartments for stuff, and was highly reflective. It served me very well until some low hanging branches ripped it to shreds.
    You’ll want a bag that can hold your work clothes, lunch and technology. I like my Adidas bag because it has two straps that snap across the front for extra security. It also has a separate compartment originally designated for shoes that I use for my riding clothes.
    That’s really all you need to get started. There’s other gear you might consider as you continue.

    Other Gear (Technology, mostly)

    Fitness Watch

    I like to track my rides in Garmin. I have a Garmin Vivoactive watch that works great for running, walking and cycling. It also has functions for swimming and golfing, but I do not do those sports enough to really have a good opinion on its performance in those areas.
    It’s good to know how long it takes you to commute back and forth. You can also analyze the map to see if there might be a more efficient route. Remember, cycling to work is a commute and efficiency is critical. You can also how your fitness level improves.

    Relive.cc

    Speaking of maps, relive.cc is a really good application that plugs into Garmin devices (Strava too, I think). When you finish a ride, relive.cc creates a map and displays your ride in a video. It’s really cool and fun, especially when you know you went fast.
    Here’s a Relive.cc video from our trip to Shark Valley.

    IFTTT – Location

    I use IFTTT on my phone to share my location with my wife. IFTTT sends a notification to a GroupMe channel whenever I:
    • Leave work
    • Arrive at work
    • Arrive at home
    Yes, it will trigger whenever I pass by work or home in a car. But judging by the time and day, Erin can know if I safely made it or not. She can also check on me if it gets late and I haven’t made it home yet.

    About Water and Exertion

    I didn’t say anything about water. Since I only ride five miles to work and it usually takes less than half an hour I do not hydrate on the road. However, I usually drink a glass before going out and as soon as I arrive at work I fill a water bottle and get to drinking. I also have protein powder at work in case I need a snack for recovery.
    I also (as mentioned) do not push myself when riding to work. I keep a comfortable pace so I do not sweat so profusely as I would if I were pushing my body to the limits. This is also for safety reasons.
    1. I go slower so I can observe and react.
    2. I go slower so I can have another gear to kick myself into should I need to get out of the way fast.

    *This post does contain affiliate links, it costs nothing extra to you but does give a small percentage to help keep StorybookErin.com going. We thank you for your support!* 

    The Secret to Keeping Cool at Disney

    Summer heat is upon us down here in South Florida, so I decided to make some “Elsa Spray” for my husband to keep in his backpack. He bikes to and from work every day, so this spray was the perfect thing for him to have. I saw this idea originally on this blog, but added a few drops of lavender EO’s to give it a little more of a soothing property.

    It is also a great item to slip into your backpack for a trip to the theme parks. Universal Studios, Busch Gardens and Disney World are all located in Sunny Florida and with limited inside rides and waiting cues, this spray could be your little secret to staying nice and cool. 

    The Recipe: 
    • 2 OZ water
    • 3 drops Peppermint Essential Oils
    • 2 Drops Lavender Essential Oils 
    The Benefits: 
    Peppermint*
    • Cooling Effect 
    • Often used to improve respiratory function
    • Can help relieve tension 
    Lavender
    • Soothing to the skin
    • Relaxing aromatic properties
    • Eases Muscle tension 
    Where do I get my Essential Oils? 
    I purchase my EO’s from my mom, who is a wellness advocate for DoTerra. With several years of personal experience with essential oils, she is a great resource. Would you consider supporting her small business?

    Kitty Slusser, Doterra

    *be sure to do your research on peppermint EO’s before using on babies and toddlers. 

    Bike to Work Month: Why I started

    Since the month of May is Bike to Work Month, and since I bike to work every single day, Erin asked me to write a few blog posts about my experience. I plan to write on several topics, including:

    • Gear
    • Safety
    • Health
    • The environment 
    • Finances

    But I’ll start this off by telling you how I started. So here goes!

    Why I Started

    So I started commuting to work via bicycle almost exactly a year ago. No, it wasn’t directly in response to B2WM, I actually had several motivations for biking to work. All listed above. Thoughts of committing to this mode of transportation were already fermenting in my mind for several months. Erin and I had even talked about it on several occasions.
    Since I know my wife so well, I knew she thought I was nuts. 
    Why would I do such a thing? It’s hot in Florida (We were in Southwest Florida for most of these discussions. News flash: it’s as hot there as it is in Southeast Florida.) Also, we didn’t have a reliable bicycle. And we lived pretty far from my job. And it was dangerous. And…
    Lesson Learned: If you listen to all the reasons why you shouldn’t do something, you’ll never do anything. 

    I Got A New Job

    I snagged a sweet gig at Florida International University on the faculty as librarian. It is a completely different lifestyle from that of a public librarian. That change of occupation was just the occasion I needed to push me to make a change in my transportation. In other words: New job, new me. 
    I made the decision to buy a bike and ride to work. It made an immediate impact in my routine. We were blessed to be able to stay with my parents while we looked for a home. They live about 3 miles from the university. However, this one decision affects:
    1. Where we choose to live
    2. When I get up in the morning
    3. When I have to leave the house
    4. When I need to leave work to come home (before rush hour)
    5. What I wear to work
    6. What I eat for lunch (I can’t really go out without a ride)

    Developing A New Ethos

    As a result of this decision, I now have a new element to my work ethos. That is, my decisions at work are directly affected by my decision to bike to work. This should not be surprising or radical. My work ethos used to be driven (pun, get it?) by my decision to commute by automobile to work. People who take public transportation are affected similarly by their commute as well. 
    It was frustrating to drive to work. As always, some days were worse than others. But a typical day included some shouting and trouble with others on the road. Likewise, cycling to work can be frustrating too. More situations can involve life-or-death decisions. I have yelled at idiots on occasion. But there’s something about getting to your destination using your own muscle power that helps with stress management. 
    It’s also a conversation starter at work. When people hear that you bike to work they have tons of questions about your experiences. At this point, I can’t imagine what colleagues would ask about my Kia… 

    So it starts

    So I began biking to work. I had a free month parking pass, so I biked about 70% of the time and drove the rest of the time. This helped me ease into the routine. 
    I borrowed my brother’s old mountain bike while I decided which bicycle to purchase. It was a rusty, rough ride, but it got me from A to B and back again, so I made the best of it. I didn’t know much about bike maintenance then, I probably could have fixed it up a bit…
    May is a tough time to start biking to work in South Florida. It’s hot already. Then comes June and summer. Heat. Humidity. Afternoon thunderstorms. If you can bike to work in summer, you can do it all year long. 
    So I did. 

    A Few Tips

    Beginner Tip #1: Take it easy

    So you’re interested in cycling to work, eh? Slow down! Don’t buy anything yet. Don’t sell the car. Don’t dive in prematurely. I did a lot of research before starting. I read a lot. I carefully planned my steps. 

    Beginner Tip #2: Talk it out

    I have a friend who is a competitive cyclist (he cycled at Penn State). So I talked to his dad about my plans. (Remember, the boy trains while the father finances and observes.) He gave me a lot of useful, valuable advice mingled with tons of encouragement. Find someone knowledgeable who will both advise you and encourage you. They will help a lot. Especially when you see them 3 months later and they ask if you’re still cycling to work. 

    Beginner Tip #3: Try it first 

    Try your best to invest as little as possible at first. Use an old bike or borrow one for the first month. Wear an old backpack. The only thing I recommend buying outright is a new helmet. Then you can reward yourself with a new bike after sticking to it for a month. By the time the new gear novelty wears, cycling will become part of the routine. Remember also that used equipment will likely perform worse than new stuff. So if you can do it with borrowed stuff, things will only get easier with new toys. 

    Beginner Tip #4: Take extra care

    Assume the drivers don’t see you. Assume the pedestrians don’t see you. In fact, assume they didn’t even think to look your way. (That is a paraphrase from that time I found myself on the hood of someone’s car.) Remember that you are very vulnerable on that bicycle and behave accordingly. 

    Beginner Tip #5: Read more stuff

    I’ll write a few more articles for StorybookErin this month explaining different aspects of biking to work. There are many benefits to enjoy along with a few pitfalls to manage. Read up and ask me questions on Twitter: @cjmnz8

    Cleaning Checklist: After the Common Cold

    As a mom of three, I am always on guard against the runny nose. When you have toddlers sharing touching and sharing everything, and a mobile teething baby crawling around putting EVERYTHING in their mouth, you need to work quickly and efficiently! 


    At the first sign of a cold, I begin this routine and each night once the children are in bed I will wipe the surfaces and toys again.
    Bedroom:
    • Open Windows, let the Sunshine in!
    • Remove and Launder All Bedding
      • Sheets
      • Blankets
      • Stuffed Animals and Comfort Items
    • Disinfect Bed
      • Wipe or Spray with a Disinfectant Agent
    • Dust the Room
    • Clean the Floors
    Bathrooms:
    • Clean as per usual
      • Pay Special Attention to:
        • Disinfect light switches
        • Door knobs
    General:
    • Open the Windows, Let the Sunshine in!
    • Disinfect All Surfaces
    • Disinfect Door Knobs and Handles
    • Change Air Filters
    • Disinfect All Toys
    • Clean the floors


    For additional support, I like to diffuse some DoTerra essential oils in the air.
    Some of my favorite blends include:

    • (2 drops) Lavender, (2 drops) Orange (2 drops) Lemon
    • (5 Drops) Wild Orange
    • (3 Drops) Lavender (3 Drops) Purify  

    If you are looking for an EXCELLENT cold fighting soup, check out my friend Meg’s blog for a recipe.
    I used her recipe as a base and added some carrots and calabaza squash for some additional flavor and vitamin C and A.

    Remember to stay hydrated, and rest!
    <3
    StorybookErin

    DIY Disney: Winnie the Pooh Party

    Bounce on over to the Hundred Acre Woods with me, as I share (far too many) photos and tips for hosting a BUDGET FRIENDLY Disney themed party!

    For the last few months our daughter has been in love with that silly ol’ bear we all know and love, Winnie the Pooh. So I put on my thinking cap, and headed over to Pinterest for some inspiration. With technology and accessibility of things such as Amazon Prime, it’s easy to burn through a huge amount of money on something like I party.

    It’s only natural to want the BEST party ever for your kid. You love and cherish them, why not throw the biggest, baddest, most pinterest worthy party ever?!!

    Friend, please if you click away from this post before reading until the end I beg you to please remember this.

    Build Memories with YOUR children,  not a pinterest board of activities never completed. 

    Time with our children goes so quickly, and especially in the toddler years, they LOVE to be with YOU. 


    Now that I’ve stepped down from my soap box, here’s my quick tips for hosting an AMAZING (Budget Friendly)  Disney Themed birthday party! 

    Set a Budget & Stick to It!
    It’s so hard, again with everything available at your finger tips, it’s so easy to add just one more quick thing. Resist the urge to over spend, stick to your budget!
    I actually was able to stretch our budget pretty far, thanks to all the Easter Sales. I shopped for the party the day after Easter, and got lots of carrot themed decorations, and yard games for the party. 
    If you have a theme, look around the sales and see if something can be inspired by the theme. 
    Get the Kids involved & DIY
    If you want to host a party your kids will love, and be excited about, get THEM involved. Hype the party up;
    • talk about costumes,
    • do some DIY’s together,
    • discuss who is coming
    My oldest got REALLY into the costuming for the Winnie the Pooh party, and declared that I would be Eeyore,  and daddy would be Christopher Robin.  So, of course I found a way to sneak in a little extra money to the budget so I could grab this shirt from Etsy. 
    Simplify Everything!
    Keep everything simple, and if someone offers to help. LET THEM! You want to be IN your pictures, and ENJOYING your kid right? If someone offers to help, let them! We kept our menu simple, and I had the grandparents make the sandwiches while I took a zillion pictures and experienced my toddler look around at all the decorations. 
    Thanks for joining me in Zuzu’s hundred Acre Woods, I hope you’ll take a moment to watch our Youtube video of photos from the party, and give us a thumbs up if you thought it was adorable! <3 

    Love the ears? Get the FREE printable here

    For the Cake Topper we used Little People, it doubled as a gift for our daughter. 

    Motherhood Diaries: Empowering Words

    I recently read an article that claimed, “your voice becomes your child’s inner voice”. As a stay at home mom (SAHM) where my children hear my voice almost all day long, this thought inspired me to rethink how I speak to my girls.

    If my words become the words that motivate them, and stick with them throughout their lives, what am I saying?

    Am I showing kindness, and respect? 
    Am I modeling the behavior I so desire them to have?
    I fail. 
    I have found myself pulling my toddlers onto my lap sometimes more than once a day asking for forgiveness.  I want my girls to know that their mom is not perfect, and their mom is learning new things every day just like they are. 
    So, how do I guide their inner voice? 
    Empowering Words. 
    I’ve made a conscious effort to share empowering words to my girls daily. For example, each night before my girls fall asleep, I whisper empowering words to them. 
    You are Brave
    You are Strong
    You are Kind
    You are Loved 
    You are Treasured
    You are Enough
    You are Powerful
    You are Wonderful
    You are Wanted
    I Believe in You
    I am Proud of You
      The other night my second daughter sits up, grabs my cheeks softly, looks at me straight in the eyes and softly says…
      “You are crazy, momma”


      How can you empower someone in your life today? 


      Disney Nature: #BornInChina

      On Earth Day, 2017 Disney Nature will be releasing another film in their collection of nature films. Our family had the opportunity to see it before it was released to the general public, and if you want to hear our thoughts or find out if we felt it was a good idea to take our two oldest (3 & 2) to the movie, Stay tuned…

      About the Movie: 
      #BorninChina takes you into three animal families living in the wilds of China. In the short 1 hour and 16 minute film, you will have the opportunity to see a year in the life of some adorable Panda’s, Snow Leopards, Golden Snub-Nosed Monkey and a few others.

      The film is narrated by John Krasinki.
      Rating: G

      Thoughts: 
      The visuals in this movie were absolutely stunning! If you want to see the beauty of wild China where the animals roam, go see this movie you will not be disappointed. However, if you are more interested in learning facts about the habitats and survival skills it might not be the right fit for you. Yes, you will learn about how and where the animals live, but it isn’t exactly presented in the same more serious style of other nature documentaries available.

      My toddlers enjoyed the silly remarks and jokes spread throughout the film, and I enjoyed seeing their excitement about the animals.  So, although I felt it a little hard to connect with the stories, I did enjoy the visuals of the film.

      Was this film appropriate for young Toddlers? 
      Yes, the content of the film was appropriate for young children. At 1 hour and 16 minutes, it was difficult for the girls to sit still. However, the quick movement between animal stories and beautiful scenery helped keep them engaged.

      The movie does take you right into the habitats of the animals, and some images may be a little scary for younger audiences, but it provides an opportunity to talk with your children about animals and respecting them. There was one scene with the monkey’s that was a little intense and again with the leopard, but it wasn’t gruesome.

      Educational Opportunities: 
      Prior to seeing the movie, the girls and I talked about the different animals we would see. I also printed some Panda coloring pages for them to color while we chatted.

      Disney Nature has also created educational guides and activities, complete with a chart of common core standards. Perfect for Teachers or Parents to integrate into their classrooms or homes to continue the conversation with their children.

      Disney #BorninChina Educators Guide (72 Pages)
      Disney #BorninChina Activity Packet (24 Pages)

      *This is not a sponsored post, I won 4 tickets to see a preview of #borninchina from an online contest. All opinions are my own*

      What’s in My Diffuser: Morning Routine

      Anyone still hanging in with me on the 30 day shred? I must confess, I am slacking… I’ve had a hard time getting it into my routine, but I am trying my best!

      In an ongoing effort to remove heavy perfumes and candles from our home, I have turned to the diffuser. My parents have been using a diffuser for years, and I just recently received my first one as a gift and have been hooked ever since. My recent morning blend has been 2 drops of lemon and 2 drops of wild orange essential oils.


      Why Lemon and Wild Orange?
      Wild Orange
      • Uplifting Aroma
      • Powerful cleaning agent
      Lemon
      • Promotes positive mood
      • Powerful cleaning agent
      I find using this blend of citrus helps uplift my groggy-mood, and is a pleasant start to my day! 

      DIY Disney: Tangled Tower

      Walt Disney World Wednesday

      This week I did a really simple and quick tangled inspired craft with my toddlers.  Here are 3 things to love about this craft!

      1. Hardly ANY supplies required
      2. Hardly ANY setup
      3. Great for developing those FINE MOTOR Skills!

      Here’s what you need for your Tangled inspired craft!

      Supplies:

      The Process:

      Put a bunch of holes in a piece of paper and have your children practice threading the yarn through the holes. This can be tricky for your toddlers, it’s important to guide them through the process so they have fun with it without getting frustrated.
      Once they’ve gotten the hang of threading the yarn through the holes, you can move on to the actual craft. Cut a tower out of construction paper and hole punch a few holes throughout the tower.
      Have your child thread the yarn around the tower to look much like Rapunzel’s hair when she lets it down for her mother to climb.
      Once the yarn has been threaded throughout the tower, glue or tape the tower onto a piece on green construction paper.
      My daughter then added some flowers with crayons and stickers for a little extra decoration.

      Teachable Moments:

      • Vocabulary
        •  talk with your toddler share new words with them such as and help them to say them clearly
      • Color identification
        • The colors of the flowers
        • The Hair
      • Fine Motor Skills
        • To make it a little easier, put some tape around the end of the yarn to help it thread through a little easier
      As a bonus, we watched Tangled together while we finished decorating our tower.  We hope you will give this quick and easy Tangled DIY a try and love it as much as we did!
      *this post contains affiliate links, it costs nothing extra for you but a small percentage of your purchase comes to us. 
      We appreciate your support! 

      Love this craft? Would you consider sharing it?

      Love Disney?

      Consider joining my facebook group for Disney Fans to network and share Disney Magic.

      CLICK HERE TO JOIN!


      DIY DISNEY: Recipe for Grey Stuff

      My three year old is really into crafting right now, and so when we ran across the recipe for “grey stuff” we knew we HAD to try it! Cooking and Crafting with your toddlers is such a fun and rewarding experience, one I highly recommend! 

      Ingredients*: 
      Instructions:
      1. Make Vanilla Pudding, as per the instructions
      2. Smash the Oreo Cookies into small pieces
      3. Mix cookies into the Vanilla pudding
      4. Add Cool Whip
      5.  Mix in 2-3 tablespoons of Chocolate pudding powder
      6. Chill before serving
      Optional:
      • Put onto brownies 
      This recipe was super easy and fun to make. I think if I were to make it again, I would just use cookies and cream pudding instead of mixing cookies into the vanilla pudding.  As far as making it with a toddler, this was great! It was great for my three year old to practice some skills. 

      Teachable Moments:
      • Discuss utensils used
      • Read together
      • Gross Motor Skills 
        • Mixing
        • Pouring
      PIN FOR LATER 

      More Disney DIY
      *this post contains affiliate links, it costs nothing extra to you but I do receive a small amount if you make a purchase.
      Here is the post where I originally found the recipe for “grey stuff”, check her channel out and give her some support. 


      DIY Disney: Moana Necklace

      I fear we are a little late on the whole Moana craze. To be honest, I didn’t know much about it, and we didn’t see it until we rented it a few days after it released on DVD. So please forgive me if the love of Moana is old news, but…we LOVED Moana! It’s so nice to have some great non-princess movies for our girls to like.

      Our oldest daughter has recently been really into crafting, and her younger sister wants to do anything and everything her big sister does. So, I’m always on the hunt for quick and easy crafts that both a 1 and 3 year old can do.

      Crafting with toddlers can feel overwhelming, but as a mom of three young ones I am here to tell you – it doesn’t have to be! This craft can be done in about 5-10 minutes and requires very few supplies, set up and clean up.

      Supplies

      • Green construction paper
      • markers (or crayons)
      • glitter glue
      • Ribbon 
      • scissors 
      The Process
      • Have your children draw several circles on the green paper
      • cut into the shape of “The Heart of Te Fiti”
      • add glitter
      • add ribbon
      My girls spent the rest of the afternoon pretending to be Moana together. So, the next time you need a quick easy craft that shows a little bit of your Disney Side, consider our heart of Te Fiti necklace!

      2 Ingredient Carpet Refresher (Budget Friendly)

      Over the last two years I have been diving into the world of essential oils.  It was around the time I had given birth to our second daughter, and I wanted to reduce my use of cleaners with heavy fumes or toxins.

      I’d spent a lot of time on Pinterest searching for DIY cleaning recipes and today I thought i’d take a moment to share two ways I’ve used essential oils on my carpets.

      Both ways are simple, budget friendly and have been tested by me.

      This first only requires a cotton ball, and a few drops of your favorite essential oils.

      Supplies: 

      • Cotton Ball
      • Essential Oils 
        • I’ve used both lavender and orange 

      Instructions: 

      • Put the EO’s on a cotton ball
      • Vacuum the cotton ball 
      • Vacuum as per usual 
      What to expect: 
      As you vacuum, the essential oils leave a nice subtle hint. I liked to use the Orange when I would vacuum in the day time because it seemed to lift my spirits, and feel clean. I’ve also used the lavender when vacuuming bedrooms,  to give a calming fragrance. 
      Now for the second method.

      Supplies: 

      • Baking Soda 
      • Essential Oils
      • Empty Parmesan Cheese container
      Instructions:
      • Fill empty container with baking soda
      • drop 8-10 drops of essential oils
        • give it a good shake to combine
      • sprinkle the mixture all over the carpets and let sit for a few minutes
      • vacuum as per usual
      What to expect:
      The baking soda and essential oils work together to eliminate and remove odors from your carpets. I like to use this method when potty training. I just sprinkle the mixture over the accident, place a towel over top and once the baking soda has soaked in all the urine, vacuum it away! 
      These are just two quick, easy and kid friendly ways I use essential oils in my home. 
      If you are looking to purchase high quality essential oils or learn more, please pass by my moms Doterra website

      Fit Mom: Hip Hop Abs Program

      We are approaching the end of my hip hop abs program, and although my six pack abs never showed up, I thought I’d take a moment to talk about the program.

      The Trainer

      I love Shawn T.

      He’s upbeat personality helped this momma push play over and over again. I really enjoyed his personality, and had a lot of fun with the workouts, and am looking forward to doing another program with Shawn T.

      The Workouts

      The first week I was completely lost, I didn’t know my left from my right. However, that’s not anything about the workout. That’s just I’m not exactly coordinated. 😉

      I appreciated that the workouts were fast moving, and had very limited floor time. If you read my why I ditched Piyo post, you understand why.

      These workouts can be adapted for any fitness level, and any age. My 1 year old loved to dance with mom!

      The Results
      I still have another week on the program, and to be honest. My nutrition has been pretty rough lately, so I am not expecting any big results this time around. I will be sure to post them once I take them though.

      What program should I try next, should I do another round of the 21 day fix and try to destroy the Sugar Monster?

      Motherhood Diary: Tummy Time

      When you marry the son of a physical therapist, expect to be given more information that you ever knew you needed on the importance of tummy time. On top of my MIL’s (Mother in Law) advice and information on tummy time, I read far too many articles on the importance of allowing your babies time on their tummy.

      Just a few benefits…

      • Increases neck strength and stability
      • helps with core strength
      • helps relieve reflux and gas 
      • gives them opportunity to explore their world 
      Well, we are at 5 months with our youngest and thanks to lots and lots of tummy time, she can officially roll both ways and belly crawl / scoot to wherever she wants to be. 
      INDEPENDENCE. 
      She’s reaching a point in her life where she can start to show her independence a little bit and make decisions for herself. She can decide if she wants to go for the toys her sister is playing with or hang out with her Nemo toy for a bit. 
      I’m so proud of her.
      She’s proving to be just as determined and strong willed as both her sisters, and although it can be difficult to parent a strong willed toddler (or three), I am thankful for the opportunity. These girls will change the world, and it’s a big responsibility to guide them. 
      Question of the day: Who can you show kindess to today?
       

      Why I Ditched PIYO.

      So, I quit PIYO. 
      Even though my overall fitness goal for 2017 is to build my core, and my February goal was to decrease back fat. 
      I had to quit. 
      After a month of frustration with the inability to get the workouts in, I just came to terms with the fact that I just couldn’t fully commit to the program. 
      Why?

      It’s all about understanding your season of life. If I want to get my workout done, I have to do it first thing in the morning, first thing in the morning when only 1 of my 3 children are awake. 
      So, my current morning routine includes:
      • Get woken up by a toddler around 6:30 a.m.
      • Feed the baby
      • Feed the toddler
      • Put on ocean noise, to help the baby drift back into sleep
      • Workout. 
      Since PIYO has a lot of workouts that you are either in plank position, or on the floor and I have a 25 pound toddler who uses me as a jungle gym anytime i’m near the floor, I just couldn’t do it. 
      I was getting frustrated, and I didn’t feel that was the appropriate feeling to have towards exercise. So, I ditched PIYO. 
      This isn’t the season of life for me to be doing PIYO. 
      Why not workout before your kids wake up? 

      I’m going to let you in on a little secret about having three kids, three years old and younger.
      There are only a few hours that all three children are sleeping at the same time. Therefore, it is crucial that you take advantage and also SLEEP. 
      According to my Fit Bit, I am sleeping about 3-5 hours a night, with anywhere from 7-15 “restless” periods. 
      Notttttt a whole lot of sleep happening. 

      So, I’m sorry Chalene Johnson hopefully we can reconnect and workout again in the future. 
      Question of the day: What workout program did you have trouble committing to? 
      You might like…

      Motherhood Diary: Starting Solids

      I’ve had a lot on my mind lately,  a lot.  When we were praying diligently for the Lord to grant us the gift of a baby, I knew He heard us and I knew He would give us what was best for our family.

      I didn’t know the Lord had 3 babies and that He would give them to us over the span of 32 months. That’s right, in 32 months my husband and I welcomed our three beautiful girls into the world.

      This week our baby girl will turn 5 months. My sweet little Belle is growing up faster than I can believe, and I’m struggling to cope.

      There, I said it.

      At four months my pediatrician gave the green light to start solids. I must have made a face, because he quickly said “if you want”.

      If I want? 

      Nope.

      Although she is ready, I was not. I was not ready to start the journey of independence with my last baby, yet.

      But, it’s time.

      It’s time to pull out the food processor and embrace the baby food stage.

      It’s time to soak in her sweet yummy infant smell and embrace the new smells that come with starting food.

      Zoo Miami, Florida: Mission Everglades

      Raise your hand if you LOVE the Zoo? 
      Our family LOVES the Zoo and has been members of the Zoo Miami off and on since the year 2009, and now we are sharing our love for the Zoo with our three children.

      At the Grand Opening! 

      In late 2016, Zoo Miami opened their newest exhibit Florida: Mission Everglades and it is stunning! This exhibit brings families as close as you can safely get to the animals and creates some of the most exciting experiences. Where else can you slide through an Otters tank, crawl under a crocodile and feel like you are inside a bear cave all in one exhibit? 

      Inside the Everglades Exhibit, there are a few must-do activities:
      • Slide down the otter slide!
      The Otters are so playful and fun, we’ve spent a lot of time going down the slide and playing with the otters. Sometimes they will even follow you back and forth along the glass so be sure to spend some time interacting with the Otters. 
      • Crawl through the Crocodile Tank
      • This is is SO much fun, we’ve gotten up close with the crocodile a few times with this activity! 

      • Go see the Bears 
      Go visit the Bears and crawl inside their habitat! Parents, don’t be afraid to crawl inside the little cave with your children, the roof slants up and adults can stand all the way up in the back corner and be with their children as the hunt for bears. 
      • Walk Across an Aligator Tank on a Rope
      • Ride an Airboat! 
        • For $5.00 per person, guests can ride an airboat through the exhibit. 
      • Play on the playground! 
      There are so many things to do in the Everglades Exhibit, you will want to budget a lot of time into exploring this Exhibit.  
      _ _ _

      In February 20017, Zoo Miami hosted a Grand Opening for the Florida: Mission Everglades exhibit and our family had the best time! At the event, we had a chance to meet the newest member of the Zoo Squad, Ellie the Crocodile.  We vlogged the experience, so be sure to check our Youtube Channel to see the event. 

      #miamifamous 2017 Recap!

      Last January my husband and I ran our hometown race and fell in love with it. We just LOVED everything, the vibe on the course, the pineapple treat before mile 11, the beautiful Miami weather.

      2016 was an amazing race!

      Read the Recap of 2016 here.

      So, the day after we ran the 2016 race, we registered for 2017! We had no idea 2016 had so many big changes for us.

      • 1. Third Baby 
      • 2. New Job
      • 3. Move back to Miami

      Um… Yeah… shortly after we registered for the 2017 Miami Famous Half Marathon we found out we were expecting baby number three, and I was going to have to run the race at just a few months postpartum.

      Baby girl was born in late September and since I was the new mom of three girls under the age of three, I really took my time to get back into fitness. A decision I do not for one moment regret. I ran a few miles here and there from November until the race, but focused on my core and general fitness during the month of January through the 21 day fix.

      When the half marathon weekend came, I was so nervous. I knew I could do it but,… I just wasn’t sure how well. My goal was just to finish.  So, how did I do? Well,… I finished.

      My finish time was 3:05:43, it wasn’t the worst i’d ever done and to be honest, I was quite proud of myself to doing that well under the circumstances. I was undertrained, and miserable in the cold rain, but I stuck to my run / walk intervals and got it done.

      I am now a 10 time half marathoner!

      21 Day Fix: Final Thoughts and Results

      On Sunday, January 22nd, I completed the 21 Day Fix!

      ::Applause::
      It was ridiculously hard for me to stay focused, and at the beginning of week 3, I had no interest in pushing play for another workout. However, I did push play each day and complete the program. 
      Thoughts on Container Eating: 
      I liked having the containers to measure out an appropriate serving size, and really felt that I learned a lot about what my body needs.  Since I shop primarily at a bulk grocery store, I found that I got bored with the options I had in my fridge. I think next time I would shop at a regular store and buy smaller quantities. 
      Will I continue container eating? 
      Yes. 
      I’d like to continue container portioning my meals for the next few months so that I can really understand visually what my plate should look like. 
      Thoughts on the workouts.
      Boring. 
      The workouts were fine until week three, by week three I just was so bored. I also got stronger than my weights so I had to switch the the bands and really struggled to use them – that is probably because i’ve never used them before and need more practice. 
      Will I do another round of the 21 day fix?
      Not right away. 
      I have the #miamifamous half marathon on Sunday, and after that I am going to start up a round of PIYO. 
      Results:

      • 10.5 inches lost
      • 2.6 lbs lost

        Thoughts on Results.
        I was not surprised that I only lost a couple of pounds, we had something like 6 birthday parties and a wedding on our schedule during the month of January and I would be lying if I said I didn’t have a treat. 
        I was proud that I did the daily workouts, and when I was in my own home I ate fully on the plan. 
        If you had so many birthdays and a wedding, why wouldn’t you wait and start in February? 
        Life is always going to have celebrations so why keep waiting for the “perfect” month? 
        Would you recommend this program? 
        Yes. I think it’s a great program for someone who wants to learn the basics of nutrition and portion sizes. 
        **Please note, I am not a Beach Body Coach and if you are interested in the program I will gladly put you into contact with someone who can hook you up! These are just my thoughts after completing the 21 Day Fix Program.**

        Breastfeeding on the 21 Day Fix

        Where have I been?

        Goodness! I can’t believe I’ve been MIA from the blog for so long. Truth is, I couldn’t keep up with housework, potty training, meal planning, 21 day fix workouts and everything all at once. The first thing to go is always my blog.

        So,  I apologize if you were interested in getting more up to date thoughts on the 21 day fix via my blog.

        One of the questions I’ve gotten a few times, is in regards to breastfeeding. As a woman who struggled with supply issues for my previous two babies, I was a little nervous to start any type of meal plan or diet. The value of doing the 21 day fix, is that you are not completely restricted on the amount of food you can eat, and if you are breastfeeding it is recommended that you add an additional couple hundred calories. For the most part, I’d add an additional serving of oatmeal or some more veggies on days that I felt hungry.

        We are on day 19 of the 21 day fix, and I have not noticed a decrease in my supply. My personal opinion on this, is because I have been faithful in drinking my mother’s milk tea and also the 21 day fix encourages whole foods and leafy greens, which naturally increases the quality of your milk.

        Here’s a glimpse at some of the meals we ate during the 21 day fix.

        Question of the day: Have you considered a Beach Body Program?

        Disclaimer: I am not a Beach Body Coach, but if you are looking for one I know several that I’d be happy to introduce you too. <3